


Essential Photography Terms
Explore Landscapes #28: I'm starting a series for my paid subscribers focusing (pun intended) on simplifying your photography workflow. Part 1 is essential photography terms for photographers.
I remember that when I got started in photography I was somewhat overwhelmed with how complicated all the terms, abbreviations, techniques etc. were. In my workshops and mentoring sessions I always strive to simplify photography down to the essentials that you need to know to make the progress you want with your photography.
Here are what I believe are the essential terms that you need to understand - regardless of whether your preferred genre of photography is landscape, abstract, or portraiture (or anything else). In future articles I’ll build on these terms to outline specific techniques that should help you on your photography adventure.
Note: this newsletter may be truncated in your email, you can click on "View entire message" and you'll be able to view the entire post in your email app.
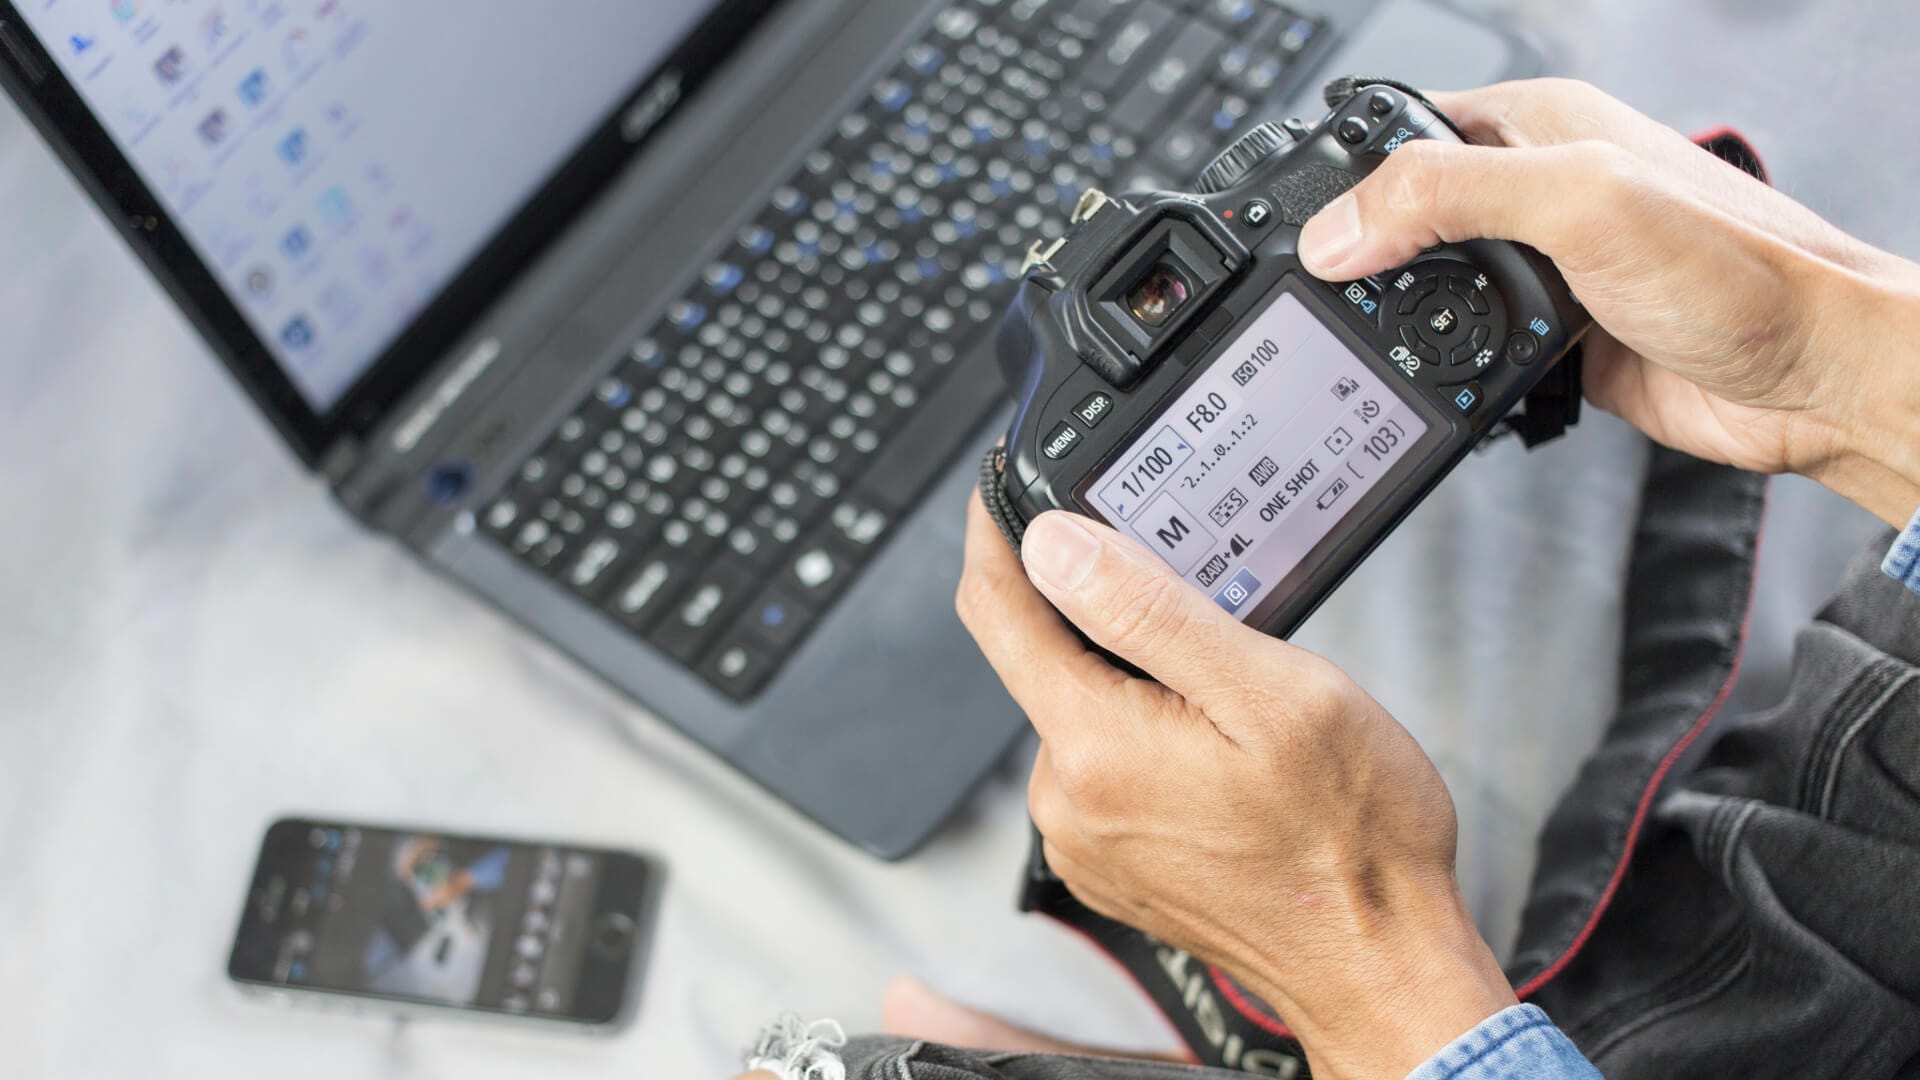
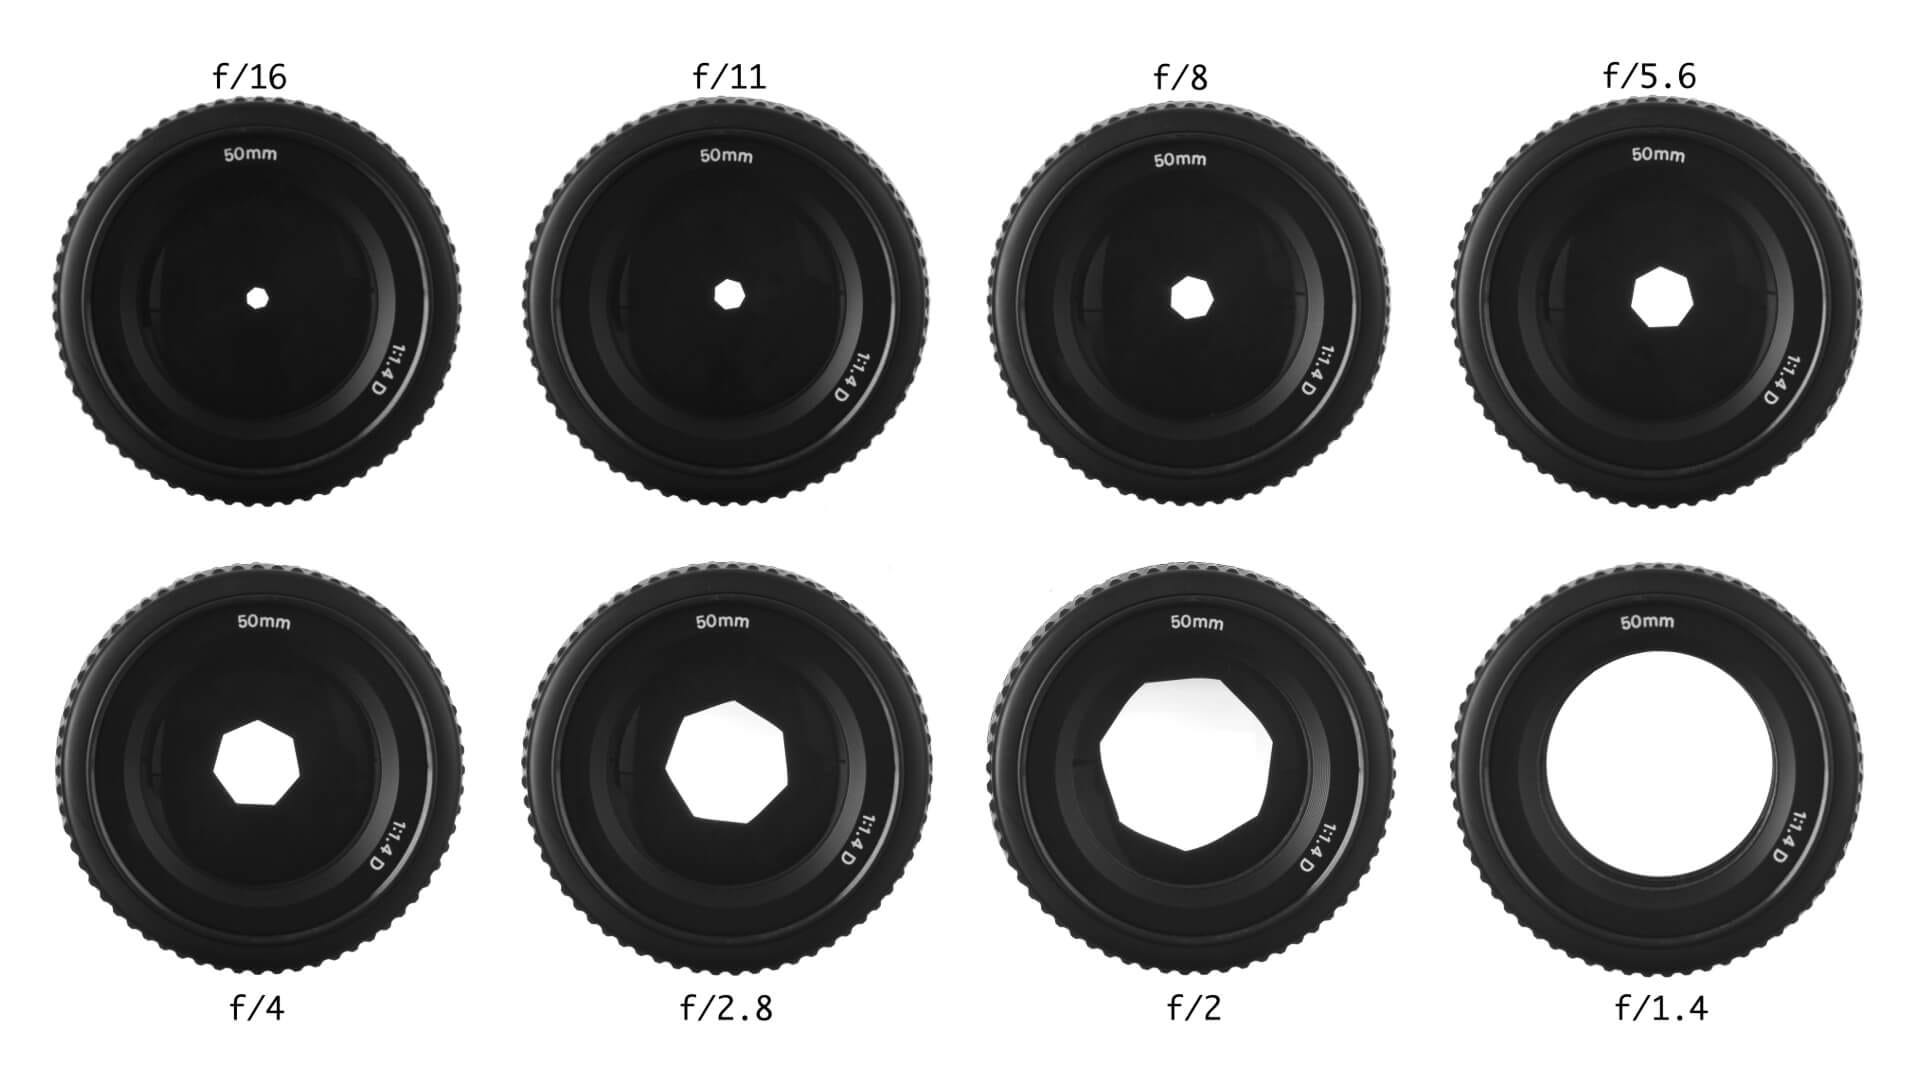
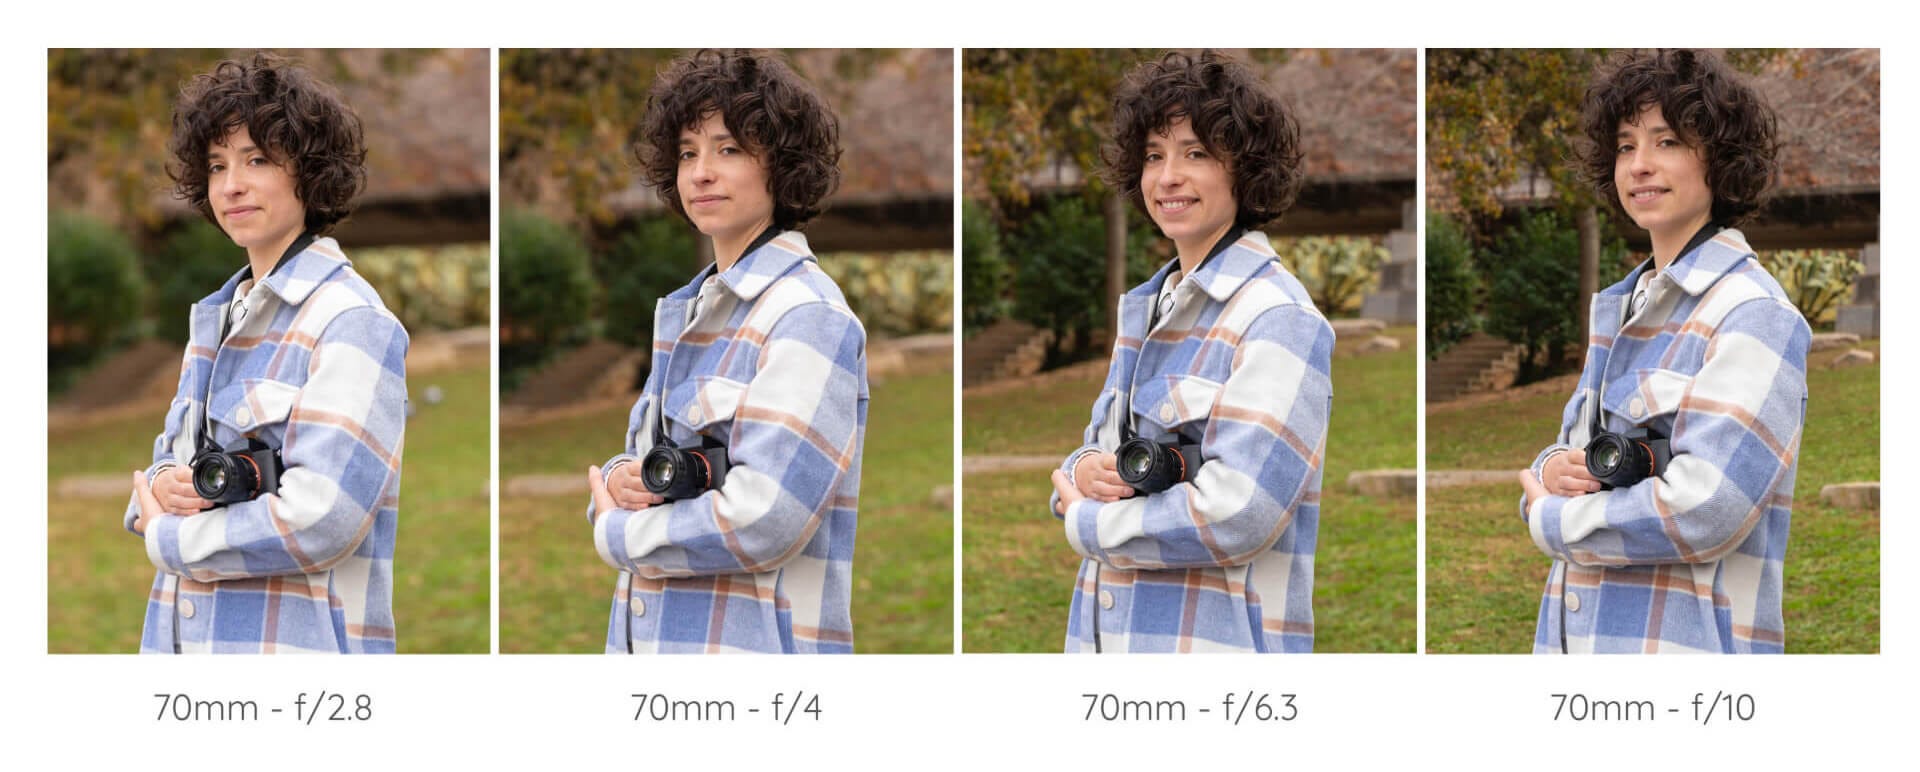
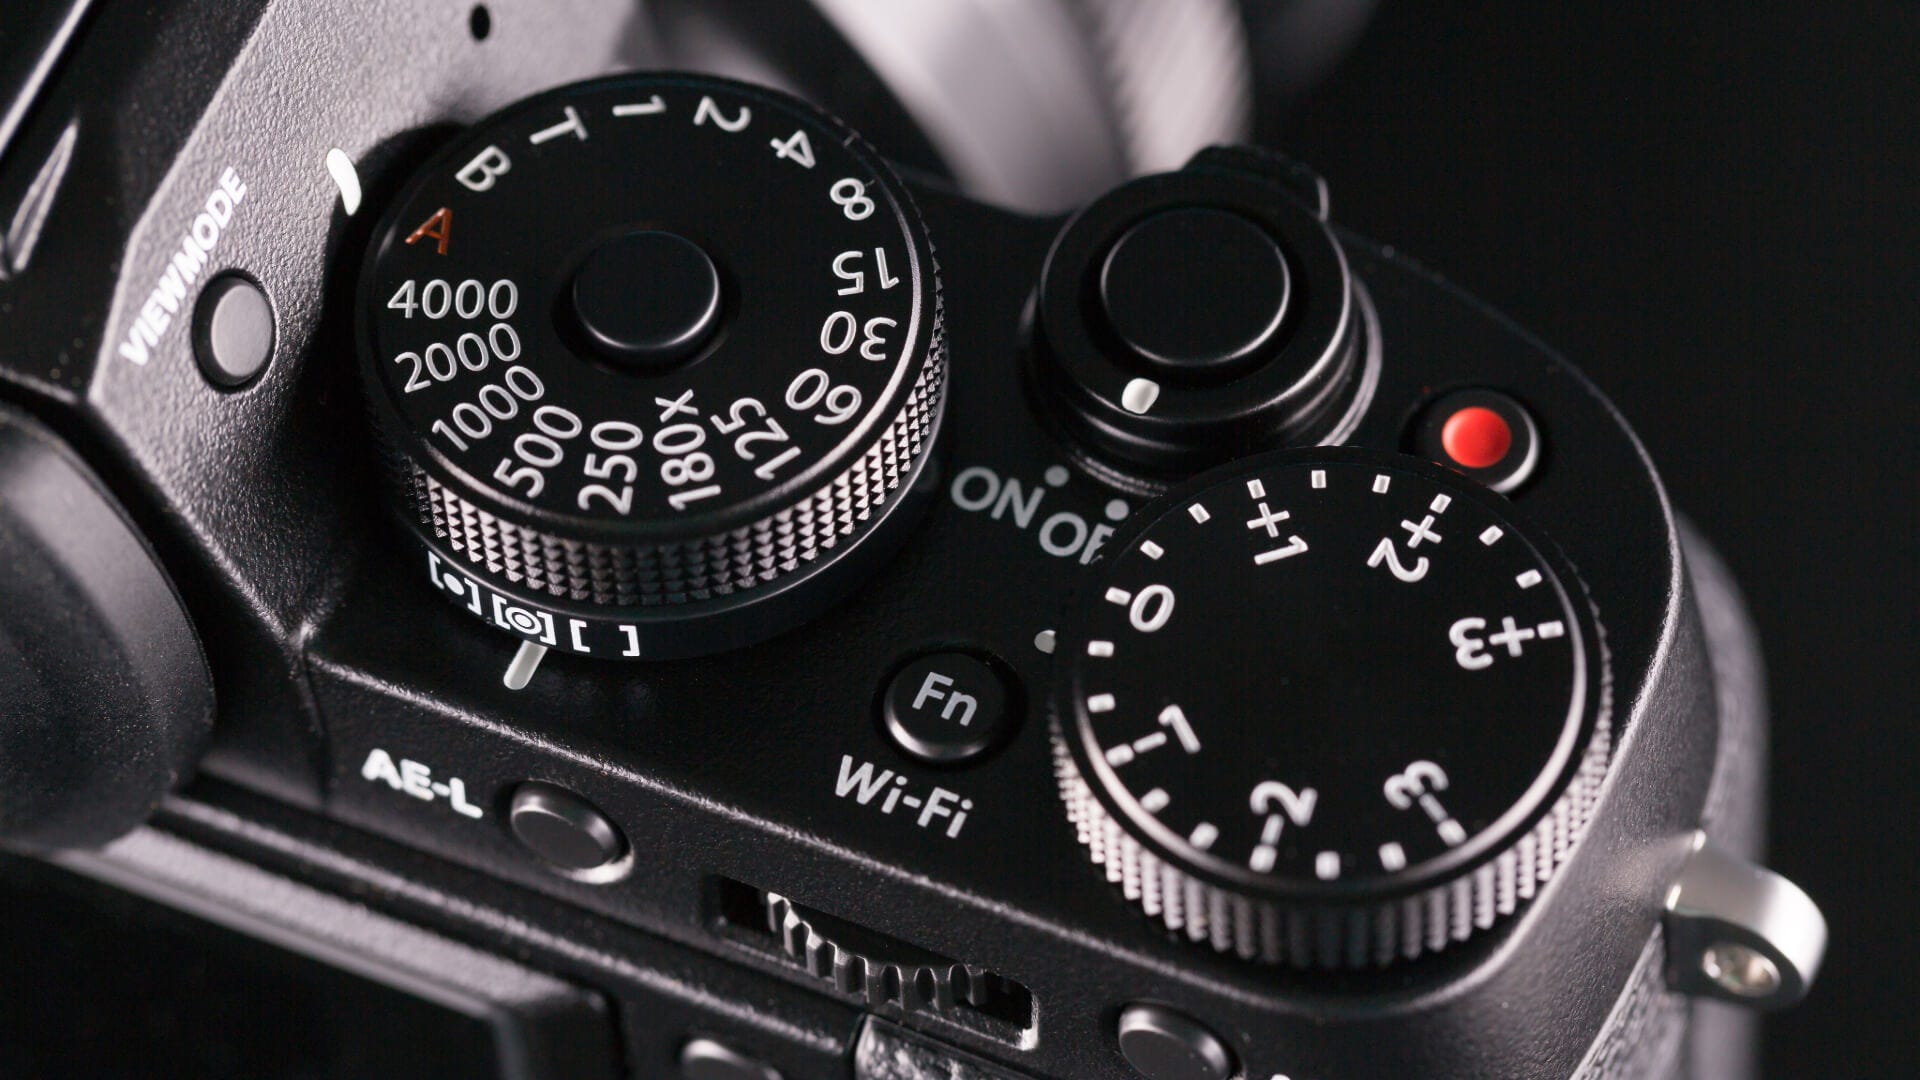
Aperture - is the size of the hole in your lens through which light passes on it’s way to the sensor (DSLR or Mirrorless camera) or film. The larger the aperture, the more light is allowed through; the smaller the aperture, the less light is allowed through. Aperture is measured in f/stops (which mathematically is your lens focal length / aperture diameter). A small aperture number (e.g. f/2.8) represents a large aperture size, and a large aperture number (i.e. f/22) represents a small aperture size. Aperture is an important part of determining exposure (along with shutter speed and ISO), and also determines the depth of field in an image.
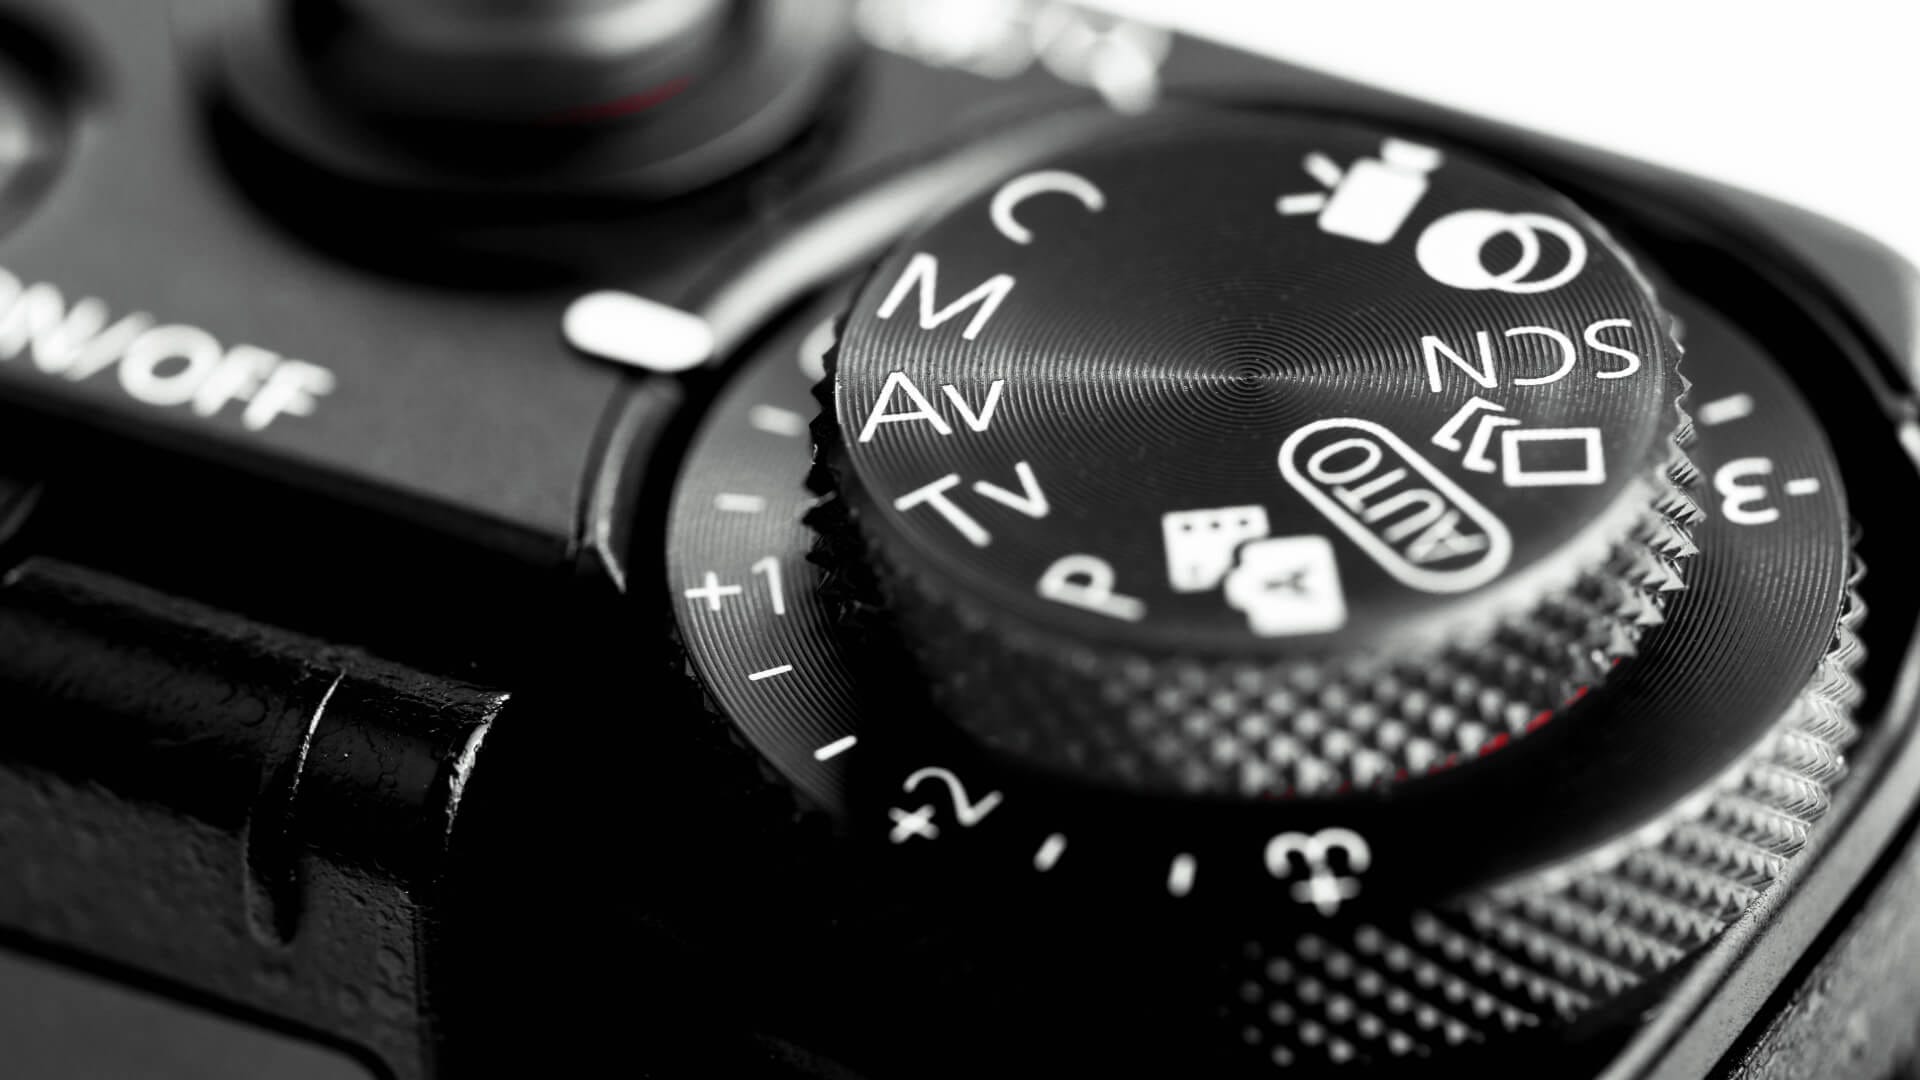
Aperture priority mode (A or AV) - is a ‘semi-automatic’ exposure mode in which you control the aperture and ISO settings and the camera selects a shutter speed to match, such that you get a well-exposed image. Aperture priority mode is typically used in situations where you want to control the depth of field of the image (explained below). This is one of the exposure modes used for landscape photography. However, it should be used with exposure compensation to get the ideal exposure for the scene that you’re shooting. You should use the histogram to verify the exposure and not rely on any of the camera’s metering modes.
Aspect ratio - is the ratio of the width of an image to its height. Typical standard camera aspect ratios are 4:3 or 3:2. Other aspect ratios that are often used are 3:5, 16:9, and 1:1 (square). There is no one right aspect ratio for a photograph - it really is down to personal choice and can be adjusted by cropping in post-processing.
Bracketing - is a camera function that allows you to take several images of the same scene, each at a different exposure, typically used when the dynamic range of the scene you’re shooting exceeds the dynamic range of your camera. For example, this may happen when you’re shooting towards the sun. Most cameras offer a choice of how many exposures you can shoot in a bracket - 3, 5, 7 or 9 frames are typical bracket sequences.
Bulb mode - allows you to keep the shutter open for as long as you wish - effectively giving you complete control over the shutter speed. Most cameras allow you to select shutter speeds of up to 30 seconds. If you need longer than that then you’d use bulb mode. Bulb mode works best when used with a remote shutter release that you can program for a specific period of time.
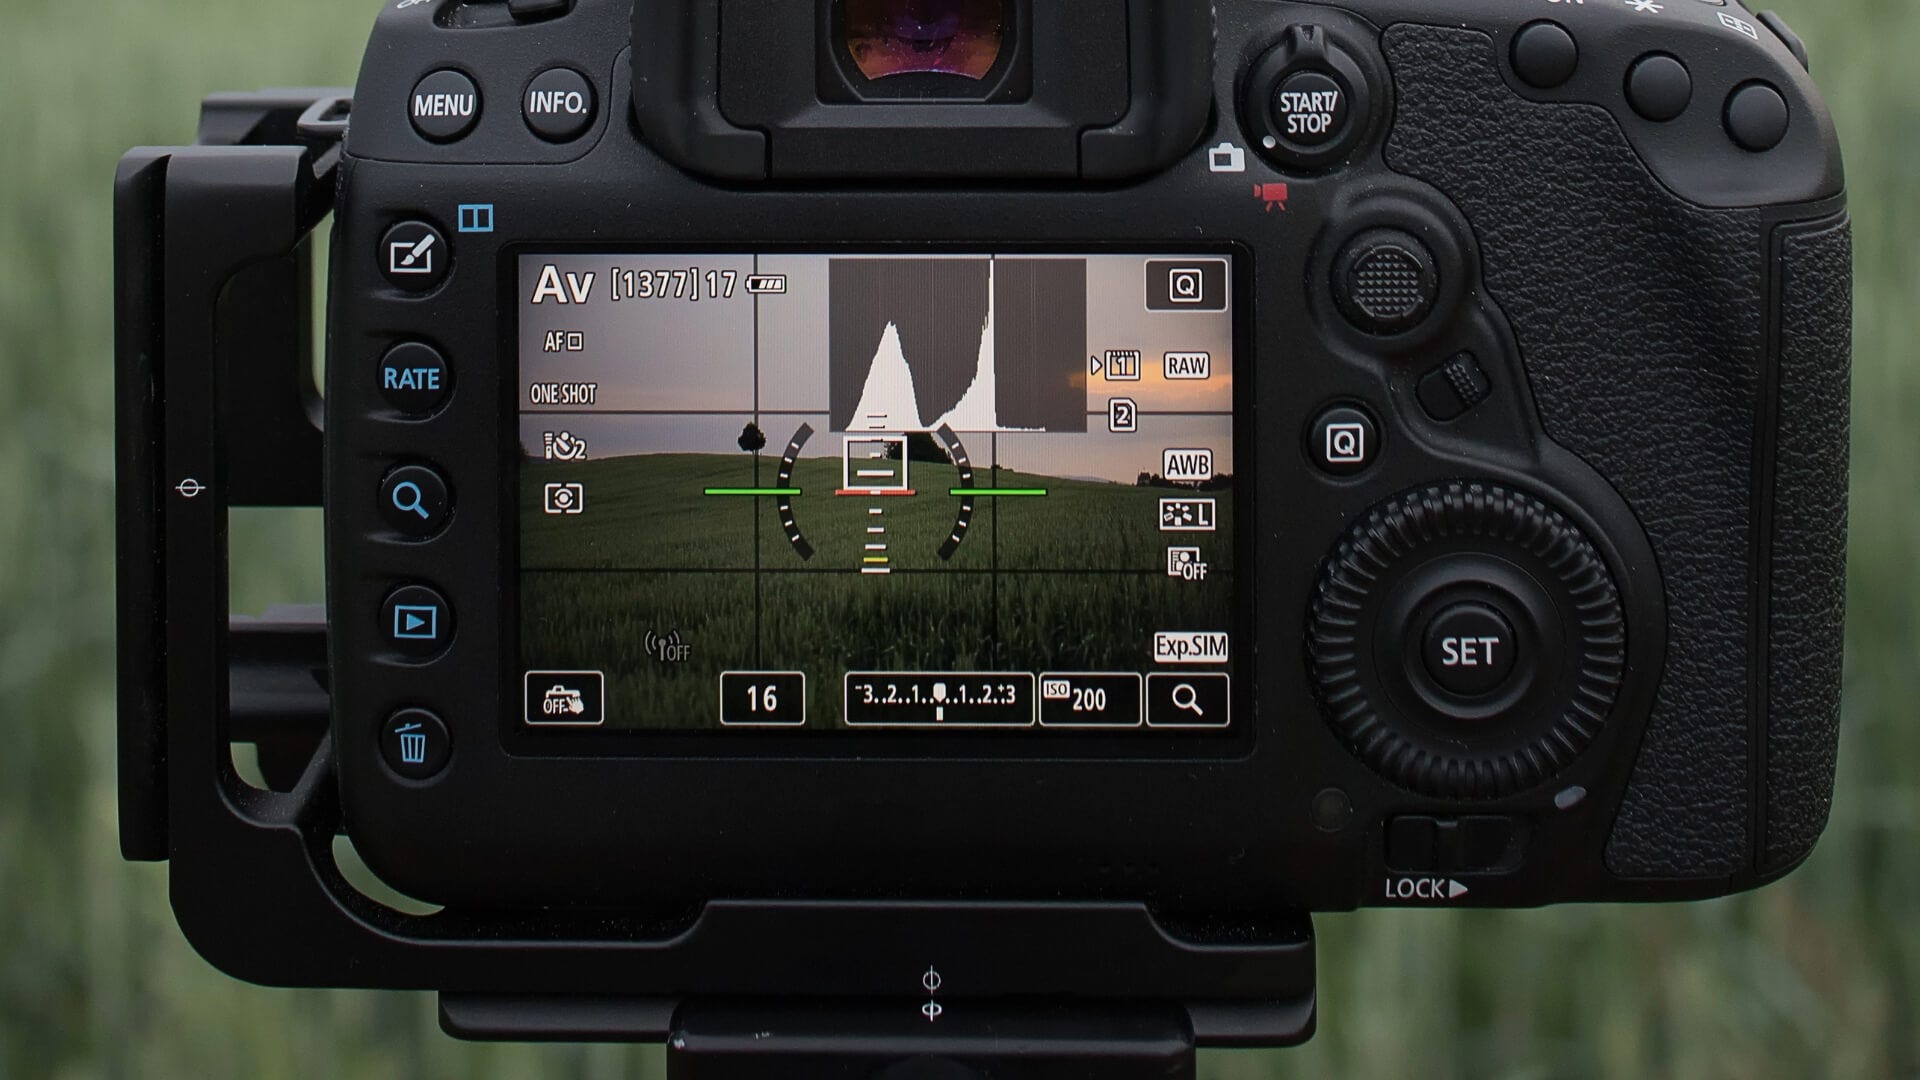
Clipping - refers to a situation in which there are areas of an image that are completely white or completely black, so have lost all detail. Clipping can be seen on the camera’s histogram and displays as the histogram curve being hard up against the LH or RH side of the histogram display.

Depth of field (DoF) - refers to the area of a photo that is in acceptably sharp focus. When you focus the camera (either manually or using autofocus) you select a certain point in the scene that you wish to be in sharpest focus. This sharpness of focus also extends in front of and behind the main focus point. The depth of field is influenced by several factors, including the aperture (the larger the size of the aperture, the shallower DoF becomes), the distance from your lens to the subject (the closer you are, the greater the depth of field), and the distance from your subject to the background (the larger the distance, the greater the depth of field).
Dynamic range - is the difference between the lightest and darkest areas of a scene that can be seen by the human eye. If the dynamic range exceeds the capabilities of your camera, highlights will be clipped and be pure white, and clipped shadows will be detail-free black. Dynamic range in a scene can be extended by bracketing (explained above).
Exposure - is a term used to describe the overall lightness or darkness of an image, and is also how the amount of light reaching your camera’s sensor is measured. An image that is too bright is overexposed; an image that is too dark is underexposed. Exposure is controlled by aperture, shutter speed, and ISO (the exposure triangle).
Exposure blending - is used to blend bracketed images in post-processing to avoid having overexposed or underexposed areas in an image. For example, you might take three, five (or even seven) bracketed images and blend them together to create one, final well-exposed image.
Exposure compensation - typically used in combination with aperture priority mode, it allows you to make an exposure lighter or darker by increasing (or reducing) additional stops of light. For example, if the image you take is too dark, you can use positive exposure compensation to make the next image brighter. Negative exposure compensation makes the image darker. Exposure compensation is measured in stops (i.e. -3, -2, -1, 0, +1, +2, +3) or fraction of stops.
Histogram - is a graphical representation of the number of different toned pixels in a scene (from dark to light). The LH edge of the histogram represents pure black and the RH edge of the histogram is pure white. There are a total of 256 tones in between black and white (in an 8-bit RGB image). The histogram shows how many pixels of each tone there are in the scene. The shape of the histogram is not important - it’s simply a function of the tones present in the scene that you’re photographing. However, it is important to avoid clipping the LH (black) or RH (white) edges of the histogram. Try and keep a small gap at the base of the graph on both sides of the curve. If you cannot position the histogram to avoid clipping then you have exceeded the dynamic range of your camera and you should bracket your exposure. The histogram can be viewed on your camera’s LCD screen (live with a mirrorless camera or DSLR using live view), or when reviewing a image already shot. Do not rely on the LCD image of your shot to determine whether you’ve taken your photograph at the right exposure settings.
ISO - refers to the sensitivity of a camera’s sensor to light (for DSLRs and mirrorless cameras). Commonly used ISO values range from 100-3200, where 100 is not very sensitive to light, and 3200 is highly sensitive to light. Along with the aperture and shutter speed set, ISO determines the exposure of an image. However, one thing to note about ISO is that the higher its value, the more likely the image is to have digital noise, which gives the photo a grainy look. This noise comes from the amplification used to record the light falling on the sensor. Typically, in a landscape photograph you want to keep the ISO as low as possible but as high as required to use the aperture and shutter speed that you’ve selected.
JPEG - stands for Joint Photographic Experts Group, and is a popular file type that compresses the data of an image into a small package. For this reason, shooting in JPEG format allows you to fit more images on a memory card. However, because they are compressed, JPEGs lose a lot of the data captured by your camera and are called a lossy format. To give yourself the maximum latitude in post-processing I encourage you to shoot in RAW format (see below).
Manual mode (M) - gives you complete control over the exposure settings of the images you take. You choose the aperture, shutter speed, and ISO, and you determine the balance between them to get the correct exposure. This is the ideal exposure mode for landscape photography.
Metering - is the process of using light information gathered by your camera to determine the proper exposure settings. There are various metering modes, including spot metering (which takes a reading from a very small area of the image (less than 5% of the total image), center-weighted metering (which takes its reading from an area in the center of the image), and multi-zone metering (which takes its reading from various points across the entire image). However, relying on any of your camera’s metering modes takes control away from the photographer and the camera may not always get the exposure right. A camera’s meter perceives the light reflected from middle gray (18% gray) as “normal” exposure. So, overly dark scenes appear gray - as do overly bright scenes. You should use the histogram to verify your exposure and use exposure compensation to get the ideal exposure for the scene that you’re shooting.

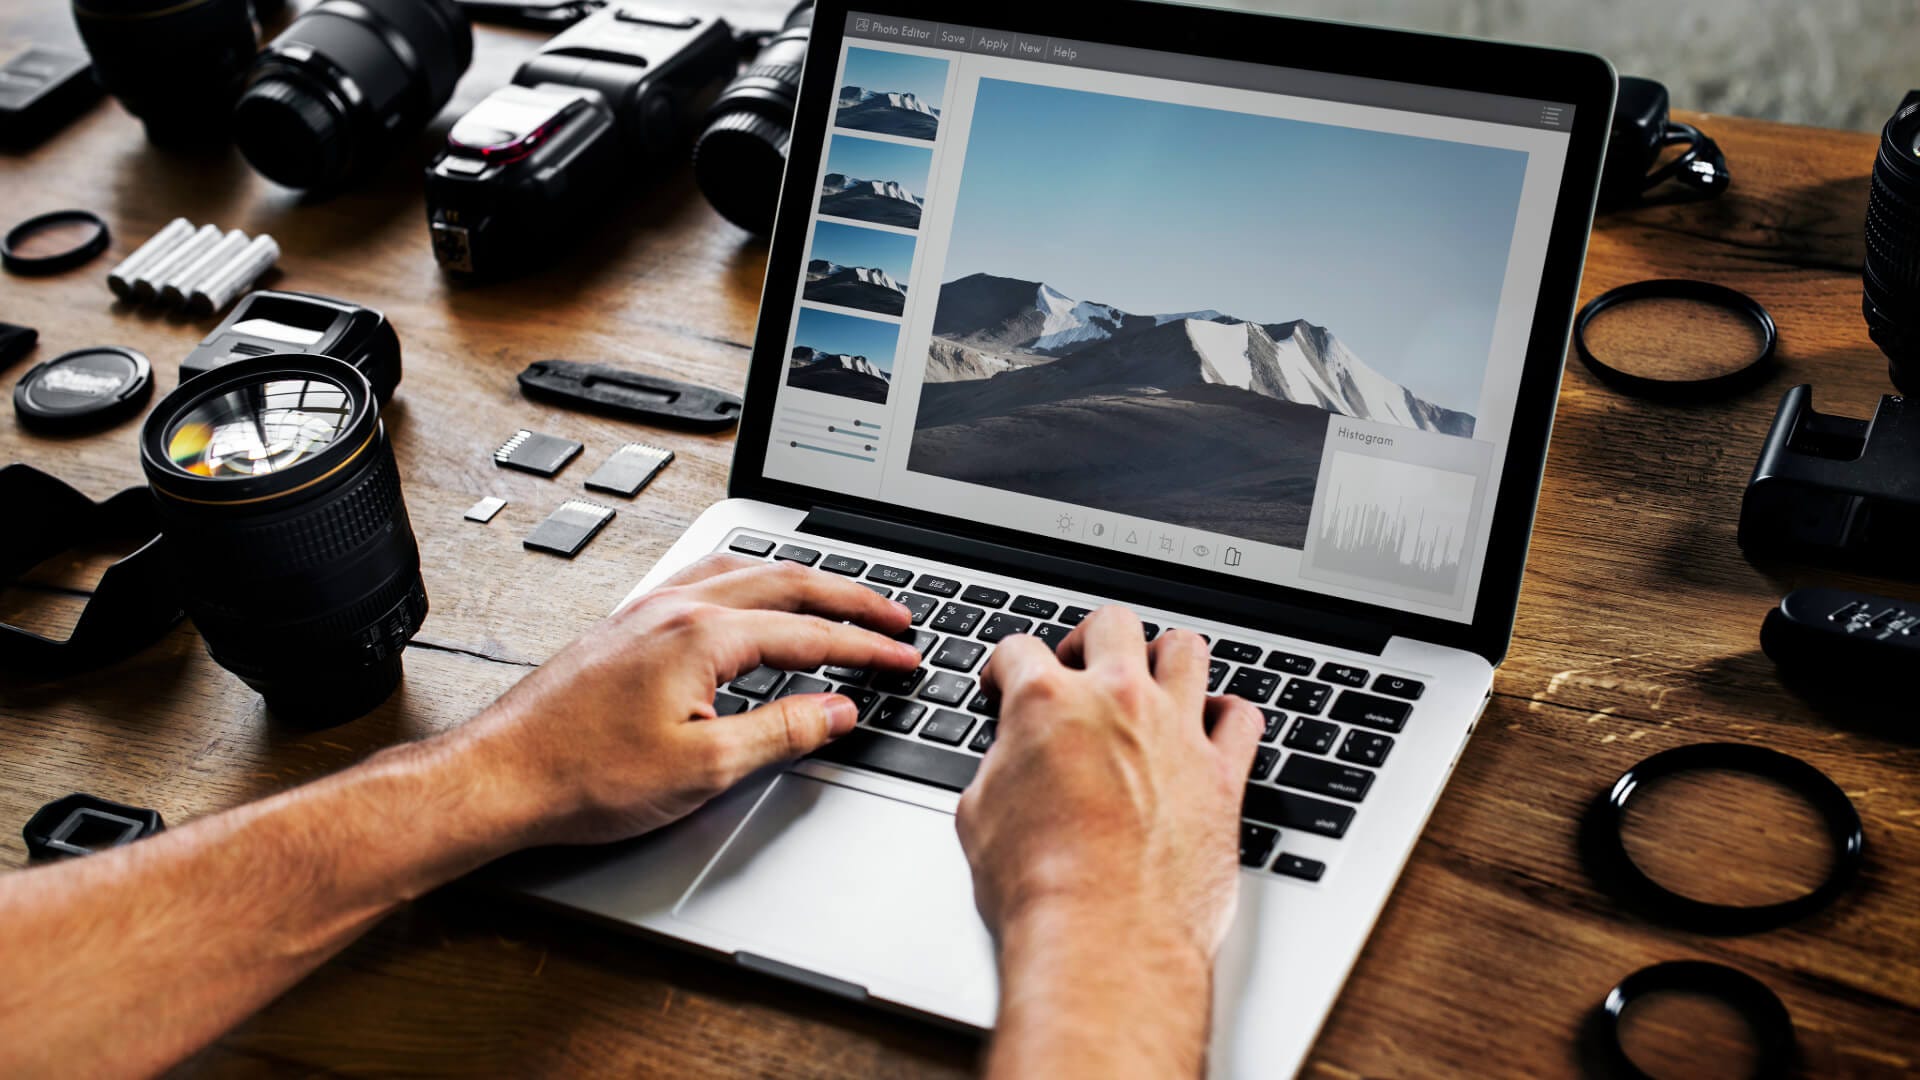
Post-processing - refers to working on the image in software programs (such as Lightroom, Photoshop etc.) to crop, rotate, correct exposure, and adjust your image.
Program mode - is an automatic mode in which you determine the ISO and the camera determines the aperture and shutter speed to get a good exposure. This is not one of the exposure modes typically used for landscape photography. If you do want to shoot in program mode, then use the histogram to verify the exposure and don’t rely on any of the camera’s metering modes.
RAW - is a file format (not an image file) that retains virtually all of the information collected by your camera’s sensor. As a result, it is a large file and one that is referred to as a lossless format, because no data is lost (unlike with JPEGs) when saved in the camera. RAW files give you much more creative freedom in post-processing because they retain so much information, and any edits you make to the RAW file doesn’t alter the file in any way. Note that if you shoot in RAW the image that you see on the back of your camera after taking the shot is a JPG that the camera has created to display an image to you. Also, the histogram you see on the camera screen (or through the viewfinder) is a histogram of that JPG image.
Shutter priority mode (S or TV) - allows you to determine the shutter speed and the ISO and the camera will select an aperture to match such that the image is well-exposed. Shutter priority mode is advantageous for situations in which you want to control the appearance of motion in an image, such as blurring the movement of a river or waterfall (as seen above) or freezing the movement of an animal. This is not one of the exposure modes typically used for landscape photography. If you do want to shoot in shutter priority mode, then use the histogram to verify the exposure and don’t rely on any of the camera’s metering modes.
White balance - refers to the process of getting the colors in an image as accurate as possible. The human eye naturally adjusts to different light sources, so objects that are white always appear white. Cameras often struggle with this at times, based on the type of lighting, so you may see a color cast. To reduce (or eliminate) a color cast white balance adjustments are needed in post-processing. There are various white balance settings, including cloudy, tungsten, fluorescent, daylight, flash, shade, and auto. Each one corrects for a different lighting situation. If you shoot in RAW then you can adjust the white balance in post-processing as it’s not ‘baked-in’ as it would be if you shot the scene as a JPEG. My suggestion is that you don’t shoot in auto white balance (AWB) but keep your white balance fixed on one of the other settings - I use shade and adjust as required in post-processing.
I hope that this overview of the essential photography terms was useful. Please get in touch with me by leaving a comment if you have any questions.
Interesting musings, images, and art from others:
Desert Stories by 90 Miles from Needles
The fragility of life by Susanne Helmert
Draw-ling by Michela Griffith
Not How But Why by Bill Sawalich
Notes from the energy transition by Jonathan P. Thompson
On Karma and Mastery by Jenn Hitze