


How to Plan and Shoot Star Trails
Explore Landscapes #7: As a thank-you to my new Substack subscribers and to introduce myself, I'm reposting some of my most popular blog posts over the next few weeks.


Last month I had a great weekend in Joshua Tree National Park during the new moon with near-perfect weather conditions for photographing both star trails and the Milky Way.
The workflow that I follow when shooting a star trail image can be broken down into three main steps:
Planning and pre-visualization
Shooting the timelapse images
Post-processing to create the final image
In this post, I will go through the first two steps and follow up with another blog post covering post-processing.
Planning and pre-visualization
To capture a star trail, you need to position your tripod/camera to point it toward the Earth's axis of rotation. Polaris, the North Star, appears to remain nearly still in the sky in the northern hemisphere while the entire sky seems to rotate around it. In reality, of course, the Earth is revolving relative to the Sun (every 24 hours - well, every 23 hours, 56 minutes, and 4 seconds). This rotation creates the star trails you capture during your timelapse sequence.
Note: If you're in the southern hemisphere, you must utilize the Southern Cross to align your image composition.
I would argue that planning and pre-visualizing your shot during the daytime is essential unless you enjoy stumbling around in the dark, trying to find foreground elements, and then lining them up with Polaris.
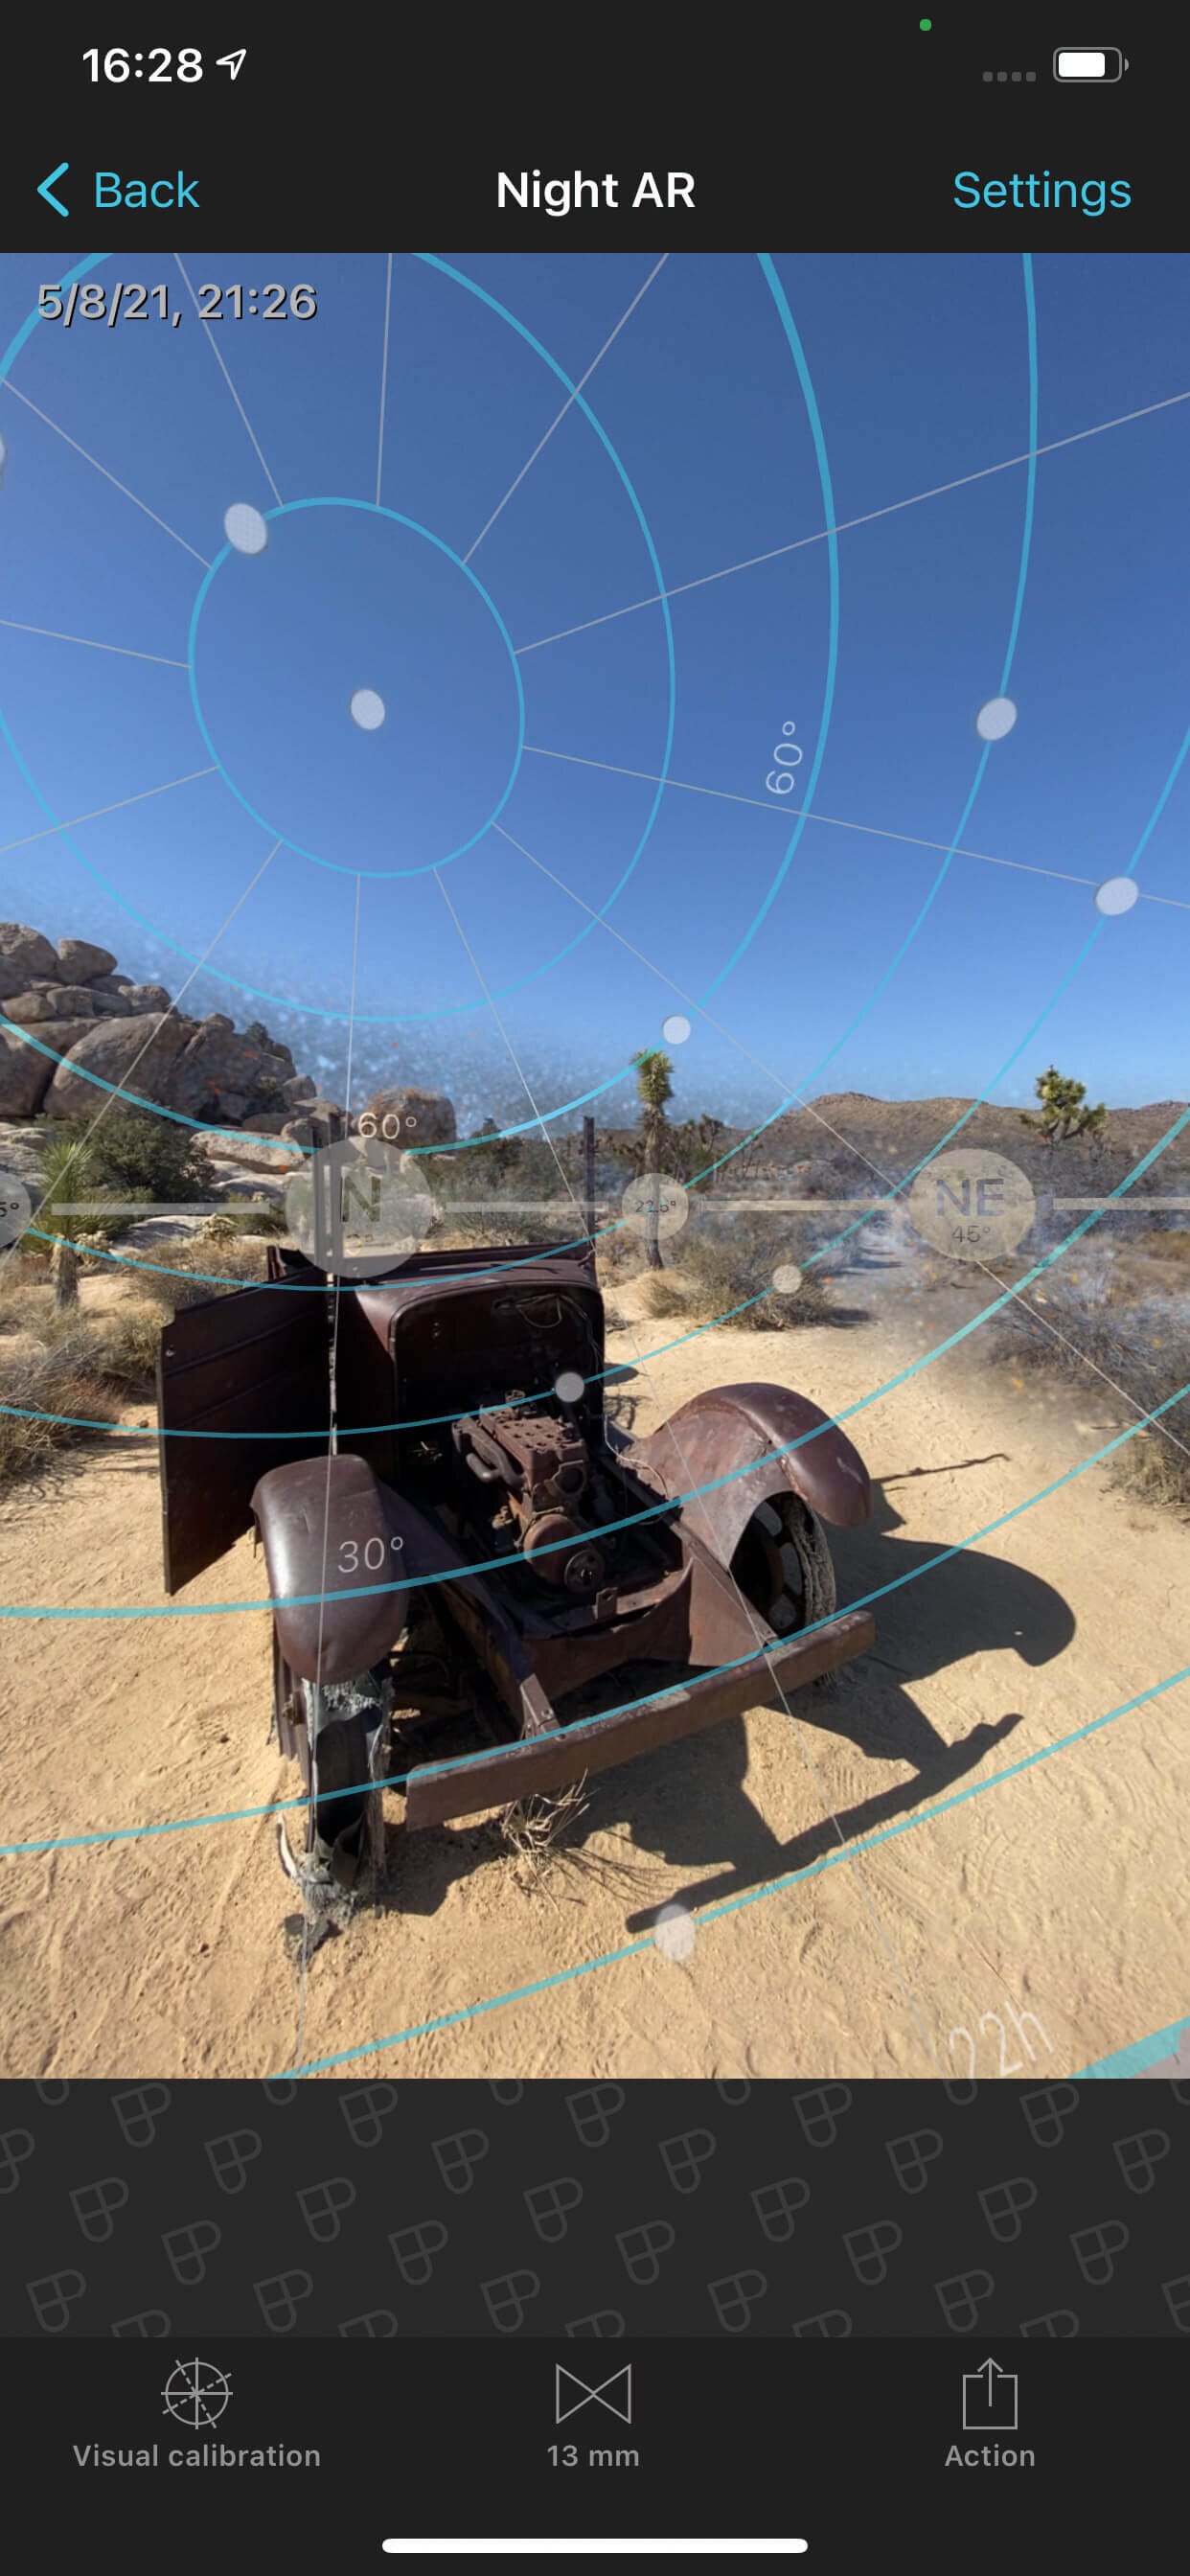
Fortunately, this is very easy using an app such as PhotoPills. By utilizing their Night AR view to pre-visualize compositions during the daytime, you can line up your preferred foreground subjects with Polaris. You can then adjust your planned shoot date and time, take a screenshot as a compositional reminder, and drop a pin in your preferred GPS map (I use Gaia GPS) so that you can find the location again.
When scouting for potential photo locations (not just for star trails but also for Milky Way images), I always take Night AR screenshots and drop a GPS pin. You may think you'll remember these locations, but you may not if your memory is like mine.

Shooting the timelapse images
As with most situations when setting up your tripod and camera for an image, such as sunrise or sunset, it's beneficial to show up early (I usually aim to be on location a good hour before my preferred shooting time).
This is even more important for dark sky photography as it can take quite some time and a good dose of trial and error to set up your composition and get your settings dialed in.
As you'll be using long multi-second shutter speeds and taking multiple photos in a timelapse sequence (typically 100+ images), you must mount your camera on a sturdy tripod to minimize movement and make it easier to align the photos during post-processing.
I use a Gitzo Carbon Fiber Tripod, which is pretty stable and reasonably light to carry. Paired with this is an Acratech Long Lens Head and Leveling Base. Once I've positioned my tripod and leveled it, using the bubble level on the head and leveling base, the camera's movement is restricted to pan and tilt only thanks to the Acratech Head. I find this so much easier than using a ball head.
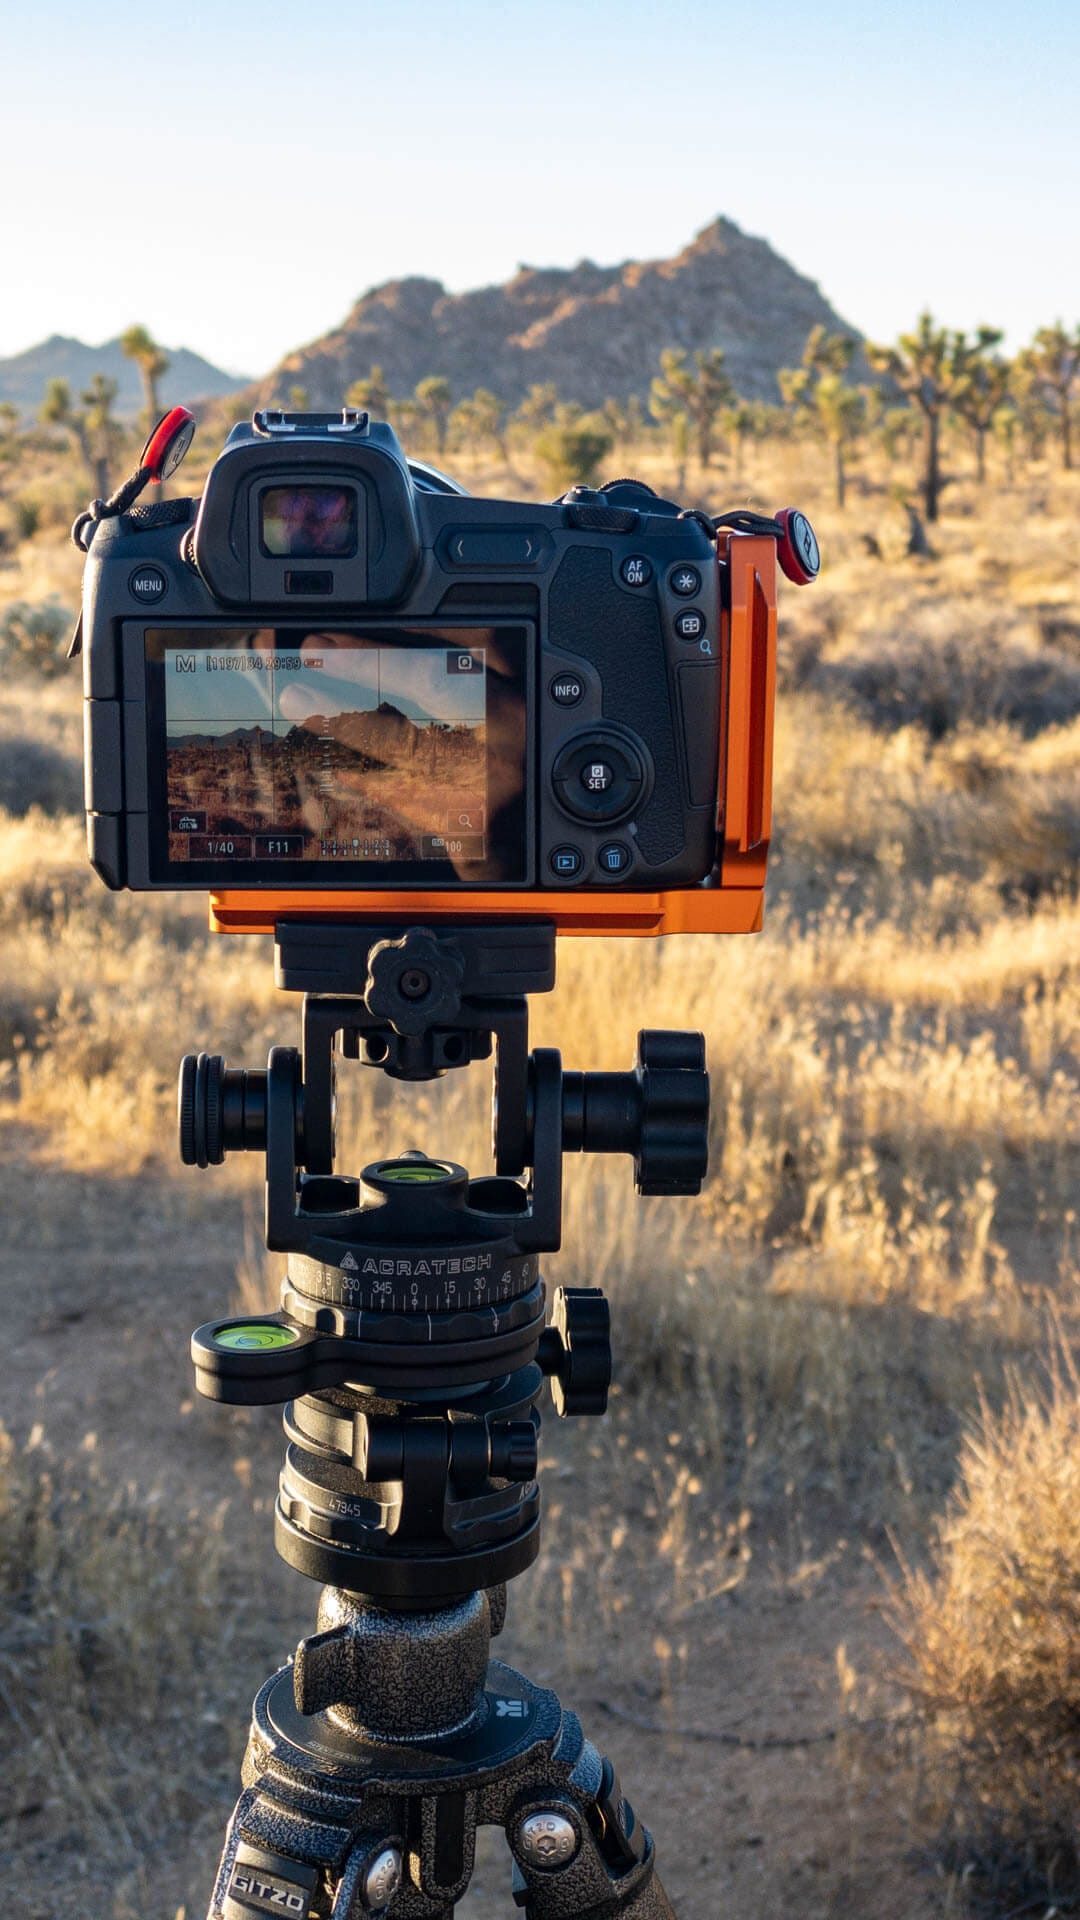
If it's not already attached, I will connect my L-Bracket to the camera and plug in my Vello ShutterBoss intervalometer (more info on that later).
For my star trail images, I like to ensure that the stars are well-focused spots rather than softer, slightly stretched 'blobs' as the stars grow tails due to the Earth's rotation. Select the correct shutter speed for your camera/lens combo to ensure spot stars in your images. Like many things in photography, this is subjective, so if you want to see star tails, adjust your settings accordingly.
The easiest way to select the appropriate shutter speed is to use the app PhotoPills. Navigate to the Spot Stars section, choose your camera model, which in my case is the Canon EOS R (which sets the sensor resolution), and then select the focal length and aperture of the lens you're using. You can leave the other two settings (declination and accuracy) at their default settings.

Under max exposure time, you'll see two different shutter speed values given: NPF Rule and 500 Rule. I typically use a shutter speed close to the NPF rule and faster than the 500 Rule value, resulting in the sharpest stars.
The specific settings, of course, will depend on the camera/lens combo that you have available to you and from composition to composition; as an example, here are the lenses and settings that I typically use:
Use a wide-angle lens, be it a prime or a zoom lens. I use my 16-35mm zoom lens, but any lens up to about 24mm will work well to frame your subject and the dark sky background (focal lengths quoted assume a 35mm full-frame camera).
Use the widest aperture for that lens; for my lens, that's f/2.8.
Set your shutter speed; in my case, I start with 15 seconds (per the NPF Rule).
Set the White Balance manually to between 3,400 and 3,900 K (depending on the amount of light pollution). This gives the most accurate sky color. I typically use 3,500 K when shooting in Joshua Tree.
Set the ISO, which, as the aperture and shutter speed have already been fixed, closes the exposure triangle and the amount of light that reaches the sensor. If required, I start at ISO 1600 and adjust to 800 or 3200 to decrease/increase the image exposure.
Set your camera to manual focus. There are several schools of thought about how to focus when shooting stars. I'll describe how I do it, which has worked well for me. If you're shooting with a mirrorless or DSLR camera with Live View, zoom into a part of the image with a bright star at 10x magnification. Manually turn the focus ring of your lens so that the bright star moves from being a larger blurred shape to a smaller bright spot. You can rotate the focus ring back and forth until the star appears the smallest and sharpest. Leave your focus set at that position.
Now it's time for a test shot. Take your first shot by using a cable release or by setting a shutter button delay timer of 2-10 seconds (depending on the camera you have). Review that first image and adjust your camera position and ISO to get the composition you're looking for at an appropriate exposure. Keep taking test shots until you're happy with the composition and exposure.
When you're happy with the composition, it's time to set up the intervalometer, which will fire the camera shutter at set intervals for a specific or unlimited duration. I usually use a shutter speed of 15 to 30 seconds, so I put this in the camera and not on the intervalometer. If you want to use a shutter speed longer than the slowest shutter speed for your camera, select Bulb mode on your camera and set a timed exposure length on the intervalometer. To give the camera sufficient time to process each image after being taken, I like to set the timed interval between shots to 5 seconds longer than the shutter speed. For example, for a shutter speed of 15 seconds, I will set the interval to 20 seconds.
I typically shoot a timelapse sequence for star trails lasting about 60 to 90 minutes, which gives sufficient time for the Earth's movement to be visible in the final processed image.
So, for a shutter speed of 15 seconds, with an interval of 20 seconds, I will take between 180 and 270 images (in 60 to 90 minutes).
If you have any questions on my workflow or any other topic I've mentioned, please comment below, and I'll get back to you.