
How to Use Exposure Bracketing
Explore Landscapes #75: So, what is exposure bracketing, and why should a landscape photographer get comfortable using this technique?
1. Introduction to Exposure Bracketing
Have you ever had a photo in which the sky looks perfect, but the foreground is just a silhouette? Conversely, you may have photos showing shadow detail in the foreground, but the sky is completely blown out to white.
Exposure bracketing will make this a thing of the past in your landscape photographs.
So, what is exposure bracketing, and why should a landscape photographer get comfortable using this technique? Exposure bracketing combines multiple images taken of the same scene, each with different exposure values (from dark to light) in post-processing.
This post is a bit long, and Substack tells me it may be truncated when delivered to your email inbox. If so, please click ‘View in browser’ at the top right of the email.
While taking photographs, I want to ensure I have all the images I may want for each scene during post-processing to create my final photograph and give myself maximum artistic latitude.
There’s nothing more annoying than realizing during editing that you should have taken more images ‘in the field’ and that you can’t achieve your desired final result. What’s missing might be images at different exposures, a slightly different composition, or a vertical orientation shot and a horizontal one.


2. The Problem with Landscape Lighting
Dynamic range is the difference between the lightest and darkest areas of a scene that the human eye can see. If the dynamic range in the scene exceeds the capabilities of your camera, either some of the highlights will be clipped and be pure white, or some of the shadows will be clipped and be pure black. Sometimes both!
Our eyes can perceive a wider dynamic range than our camera can capture in a single image. When photographing a single exposure, you may have to choose between ‘properly’ exposing the darker foreground (so you can see shadow detail) or exposing the sky (so you can see detail in the highlights). Exposure bracketing is the solution for these types of tricky lighting situations.
An image is said to be ‘properly exposed’ when the image is neither overexposed (too bright with some areas pure white) nor underexposed (too dark with some areas pure black). Please note that there’s no such thing as ‘proper exposure’ - you can choose to expose an image as you see fit to suit your artistic vision.
See the following posts to learn more about light and exposure, plus some other essential photography terms:


3. How Exposure Bracketing Works
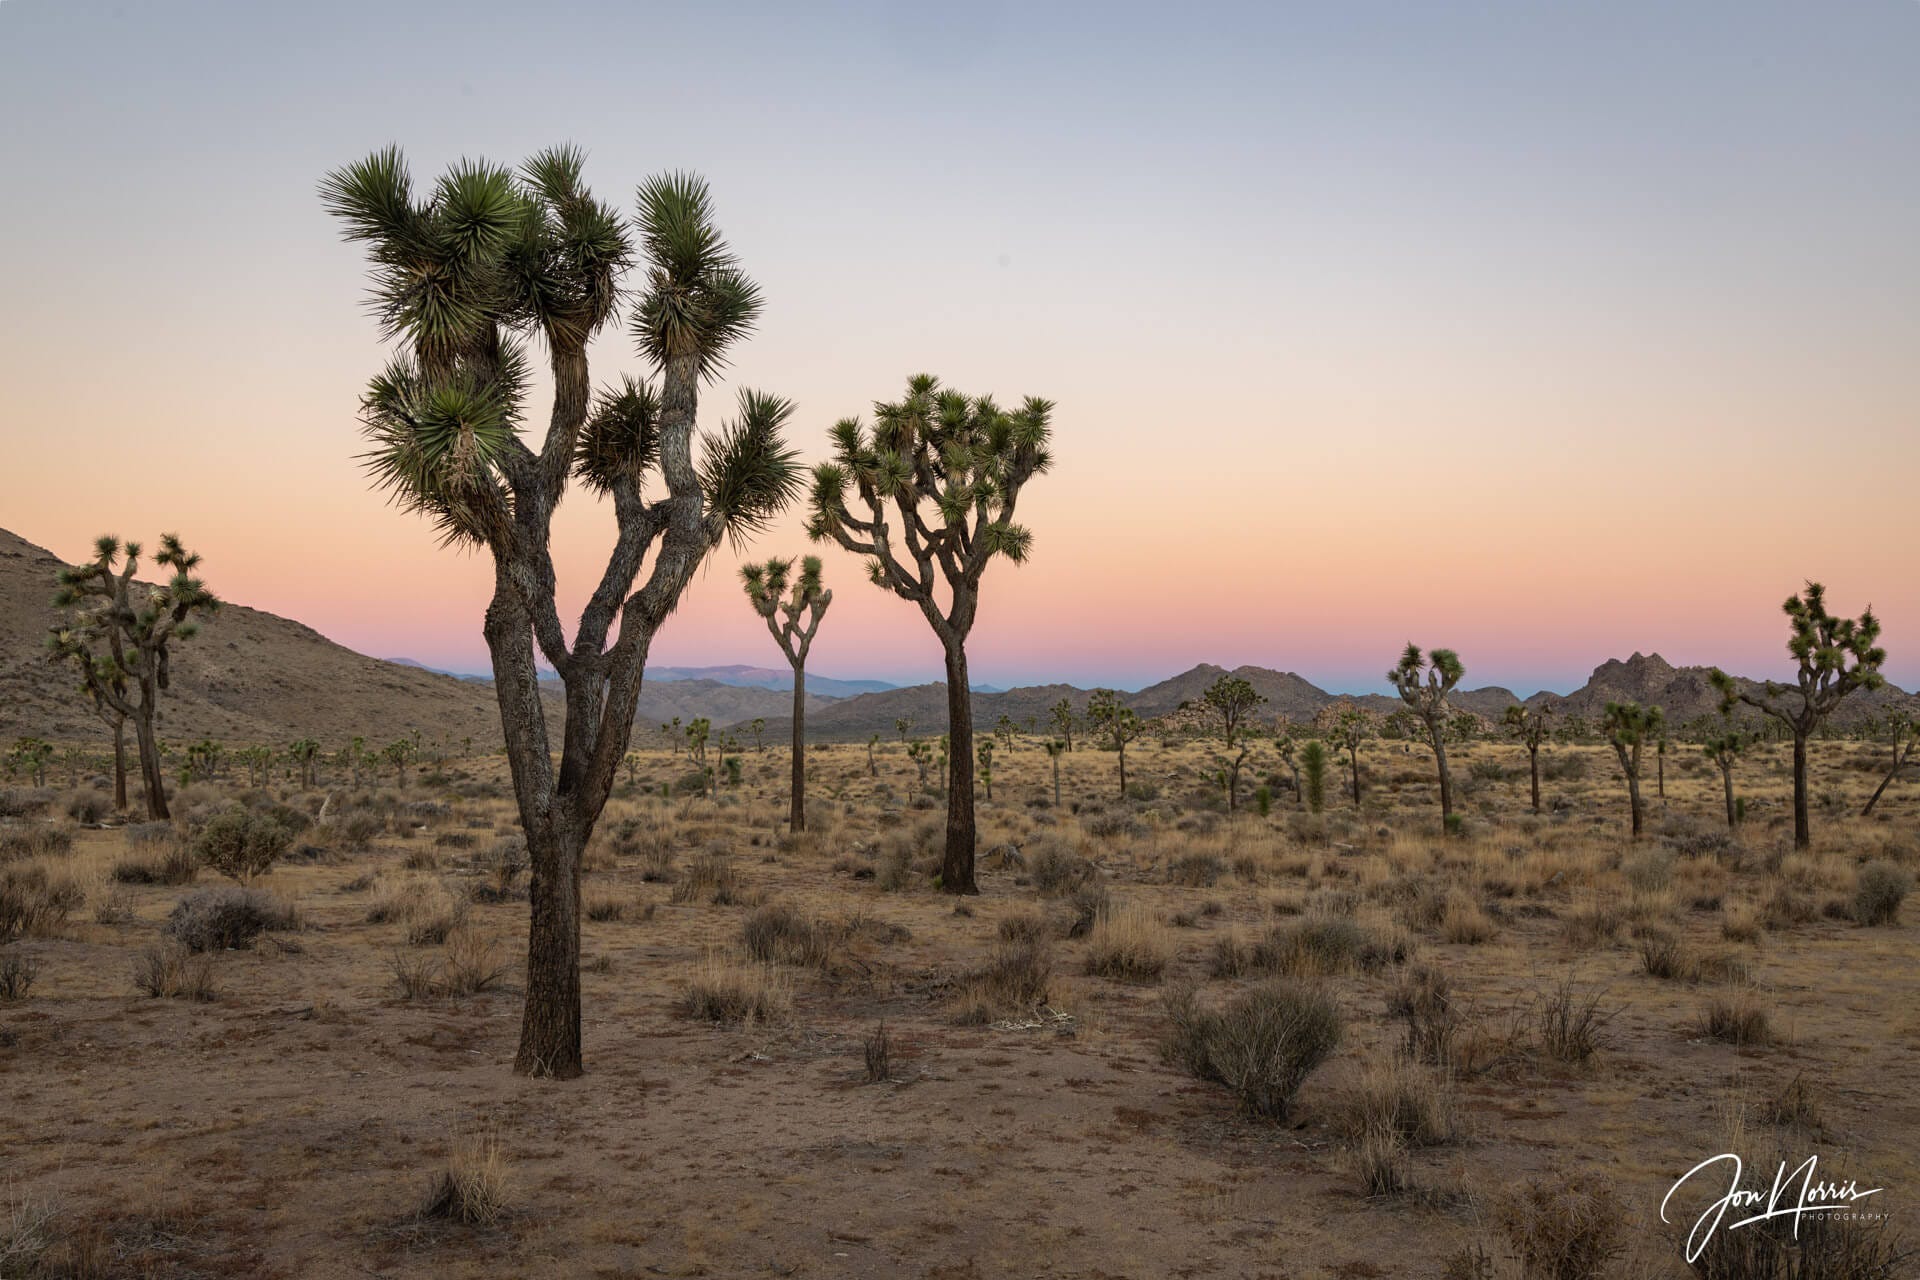
Most cameras offer a choice of how many exposures you can shoot in a bracket—typical bracket sequences consist of 3, 5, 7, or 9 frames.
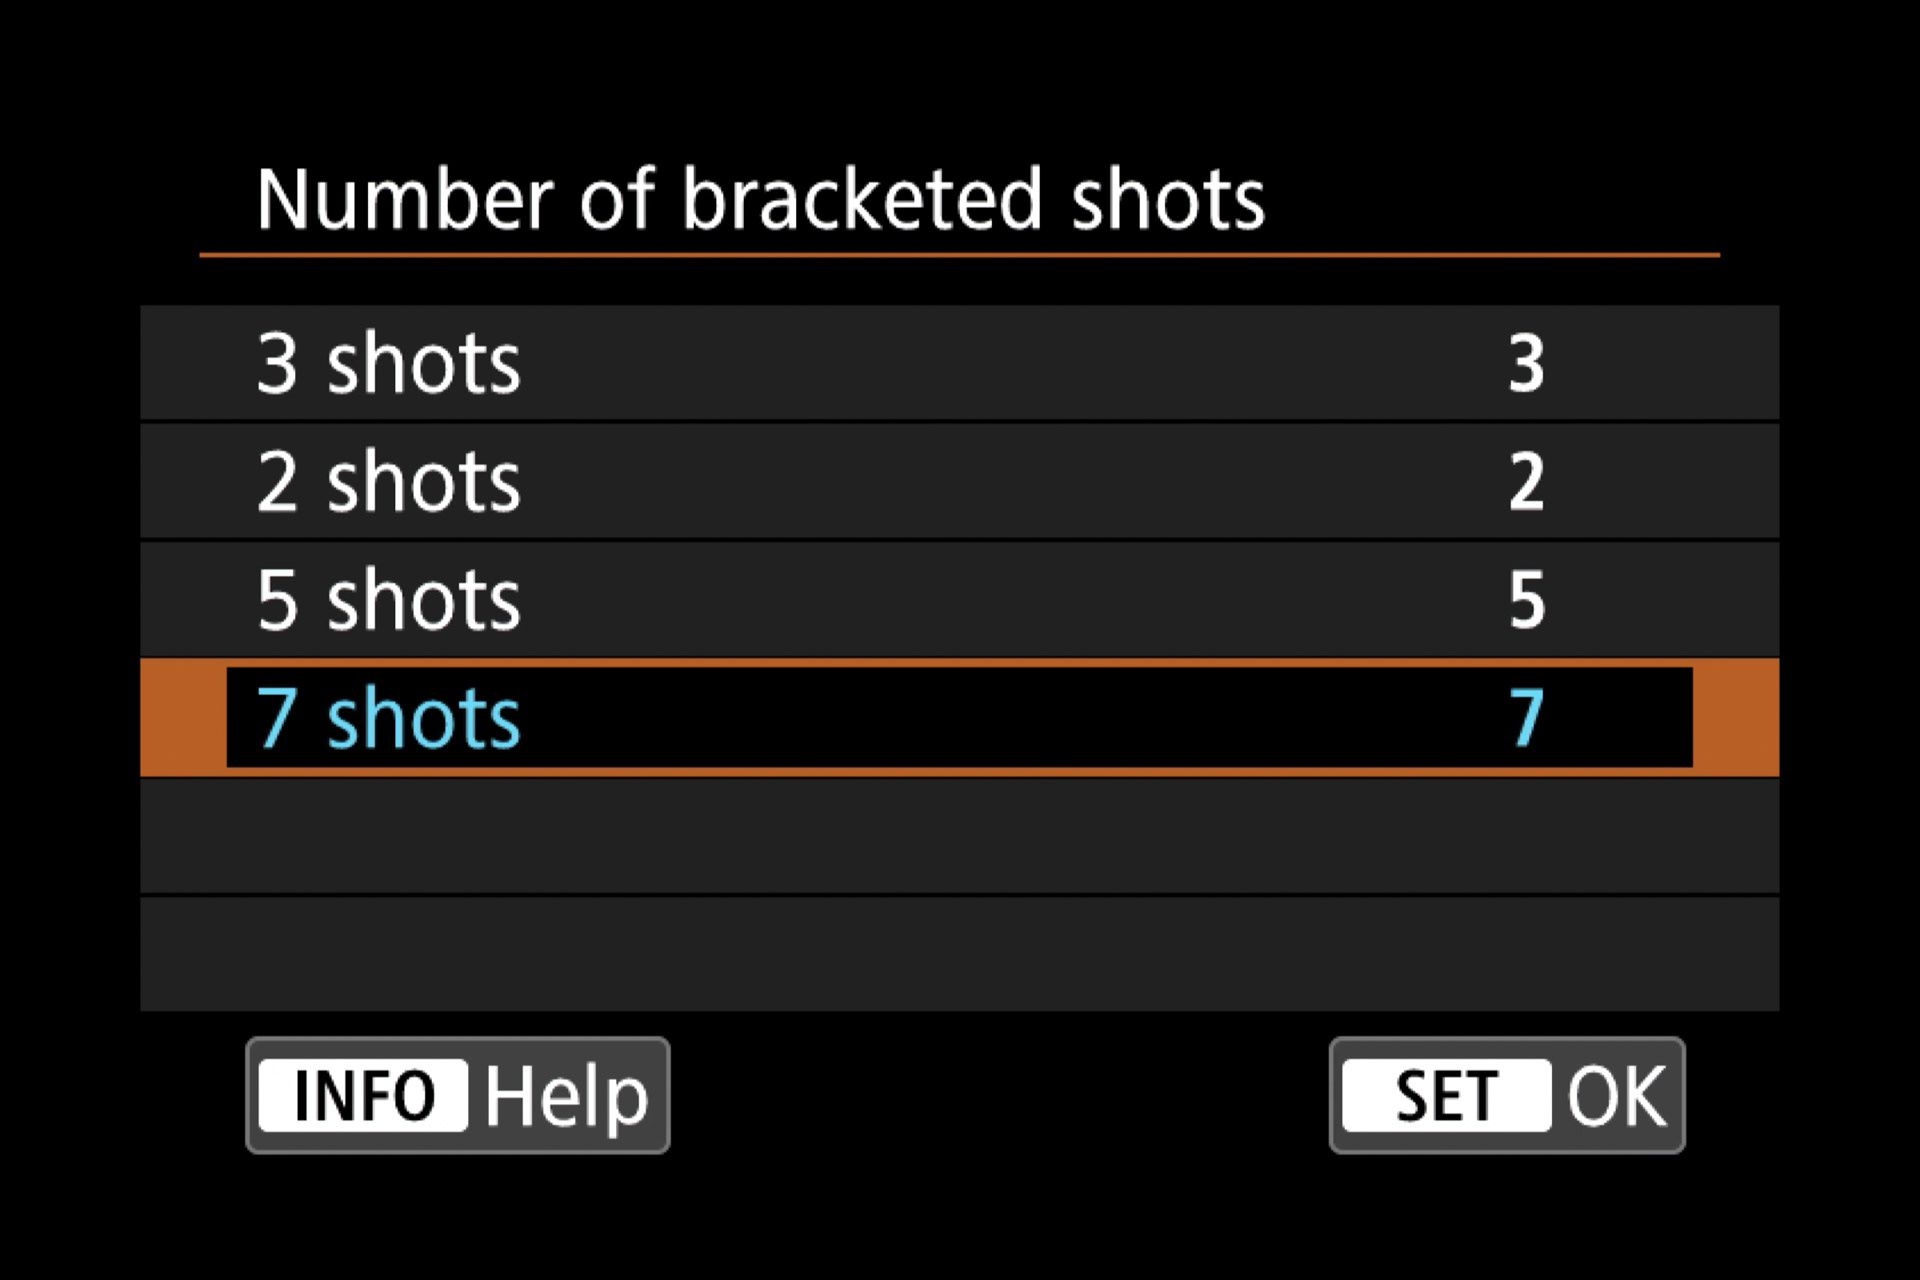
You can also change the sequence of these bracketed exposures are shot, i.e. from dark to light, or vice versa.
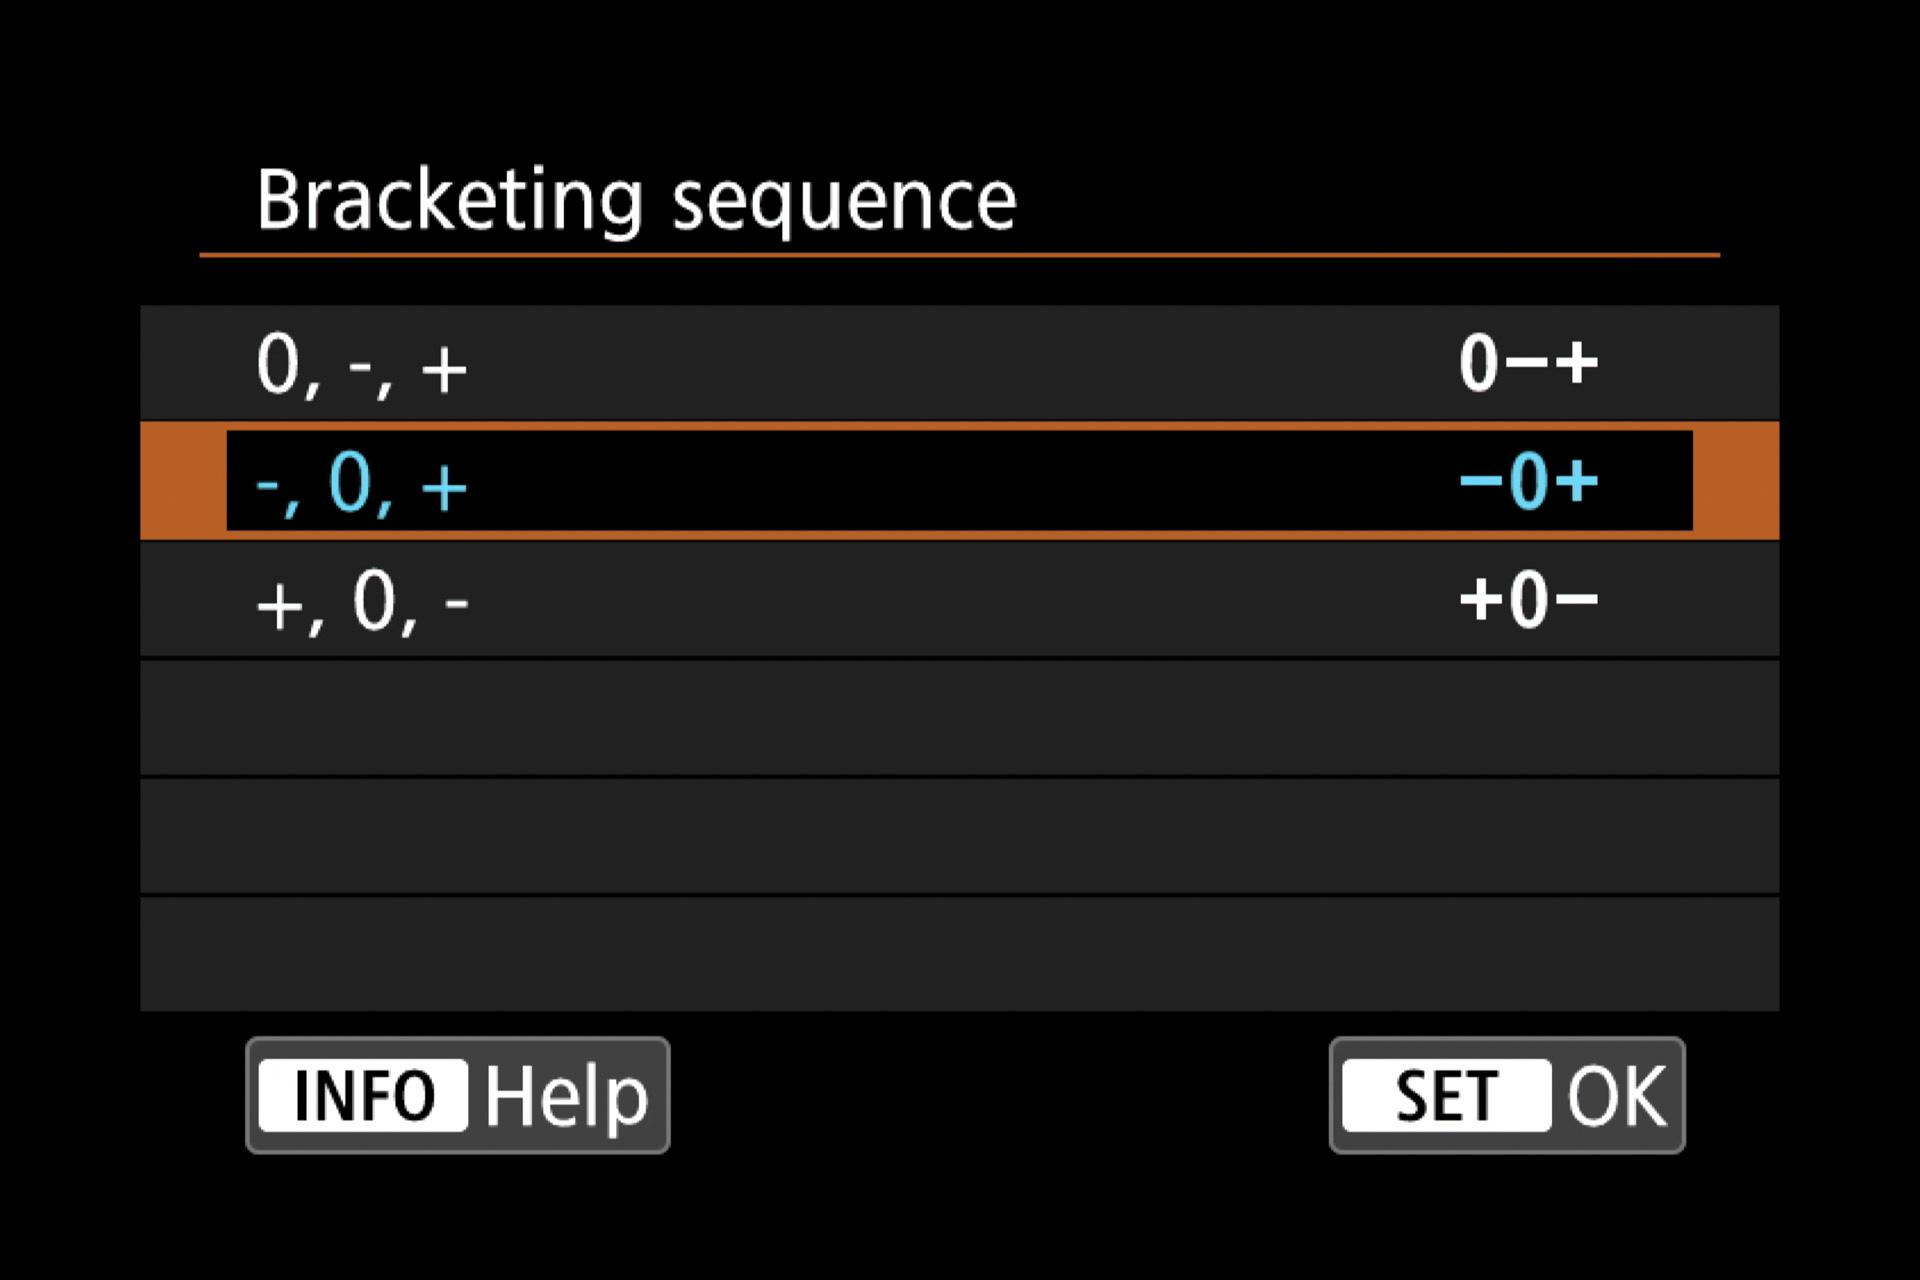
Finally, you choose how many ‘stops’ of light to have between your bracketed exposures. A stop of light either doubles or halves the amount of light in an exposure.
I typically choose a bracket of 5 (or sometimes 7) exposures, shot from darkest to lightest (-,0,+), at 1-stop intervals.
In the example images below, I shot a bracket of 5 different exposures and decided to combine just 3 of the images. This was because the darkest and brightest exposures were so clipped that they didn’t add anything to the final image.
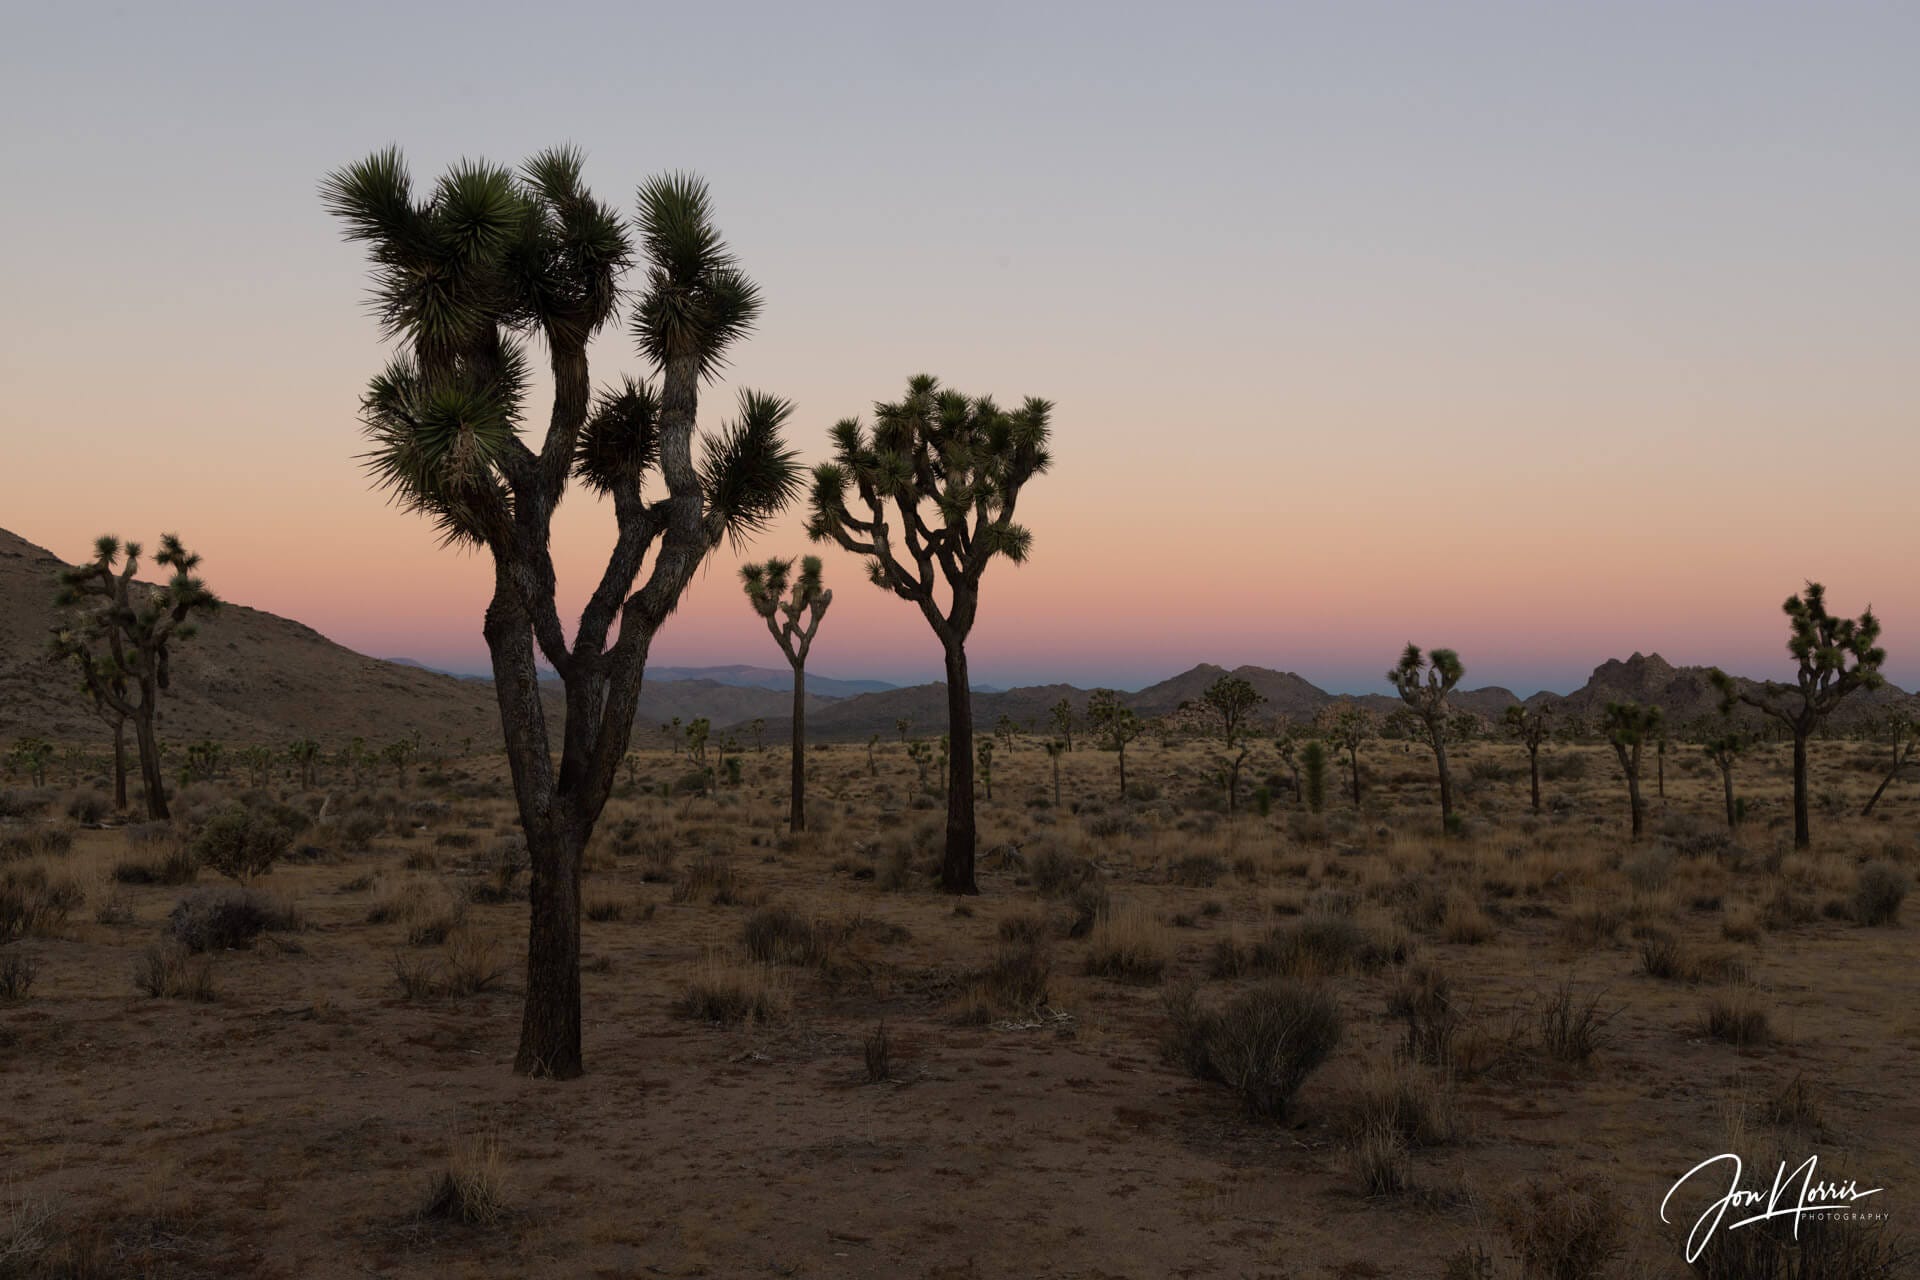
The first image (the darkest) captures the most detail and color in the sky without clipping the highlights.
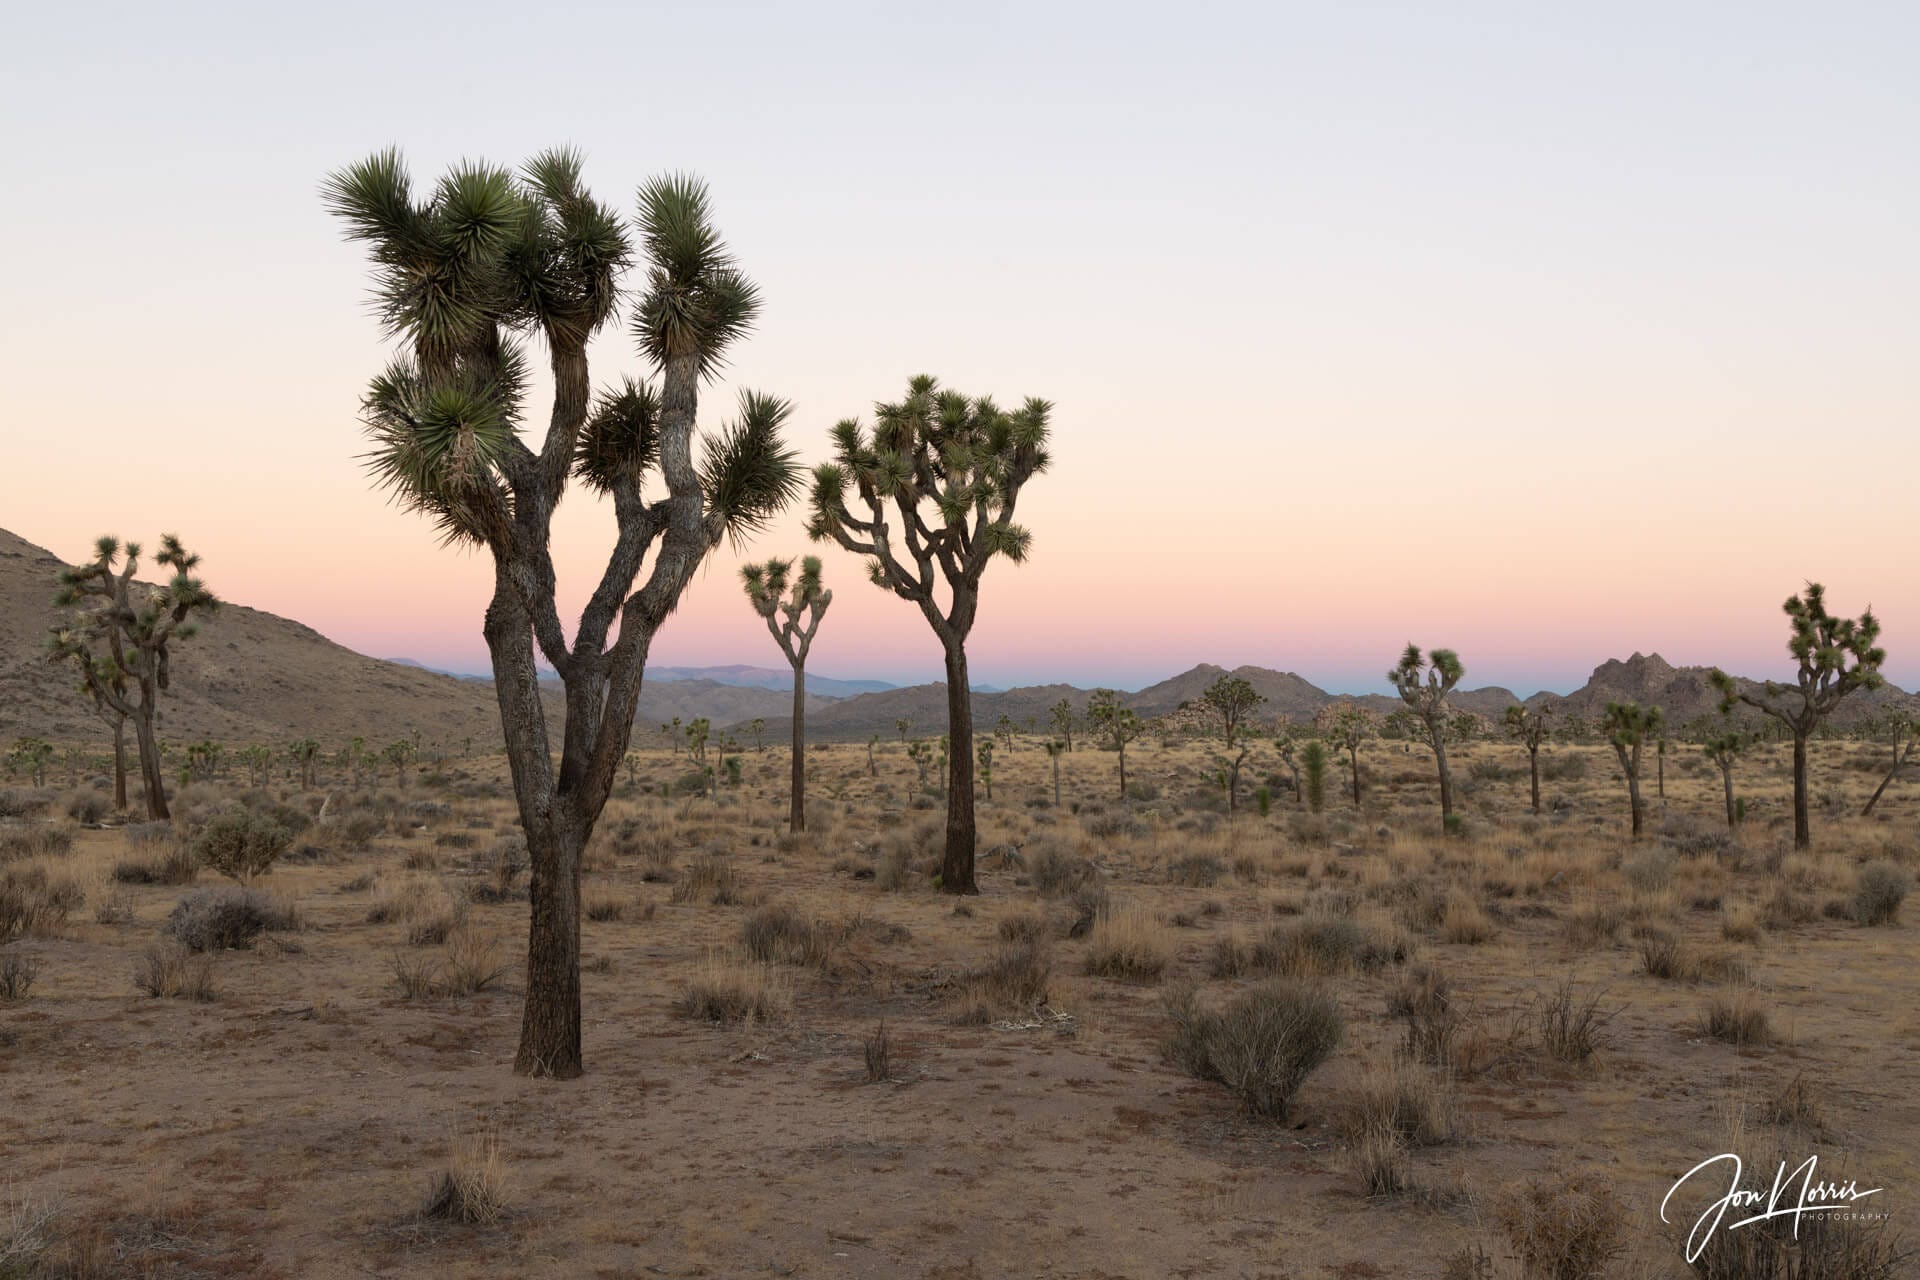
The second image (the mid-tone) captures some detail and color in the sky and some detail in the foreground.
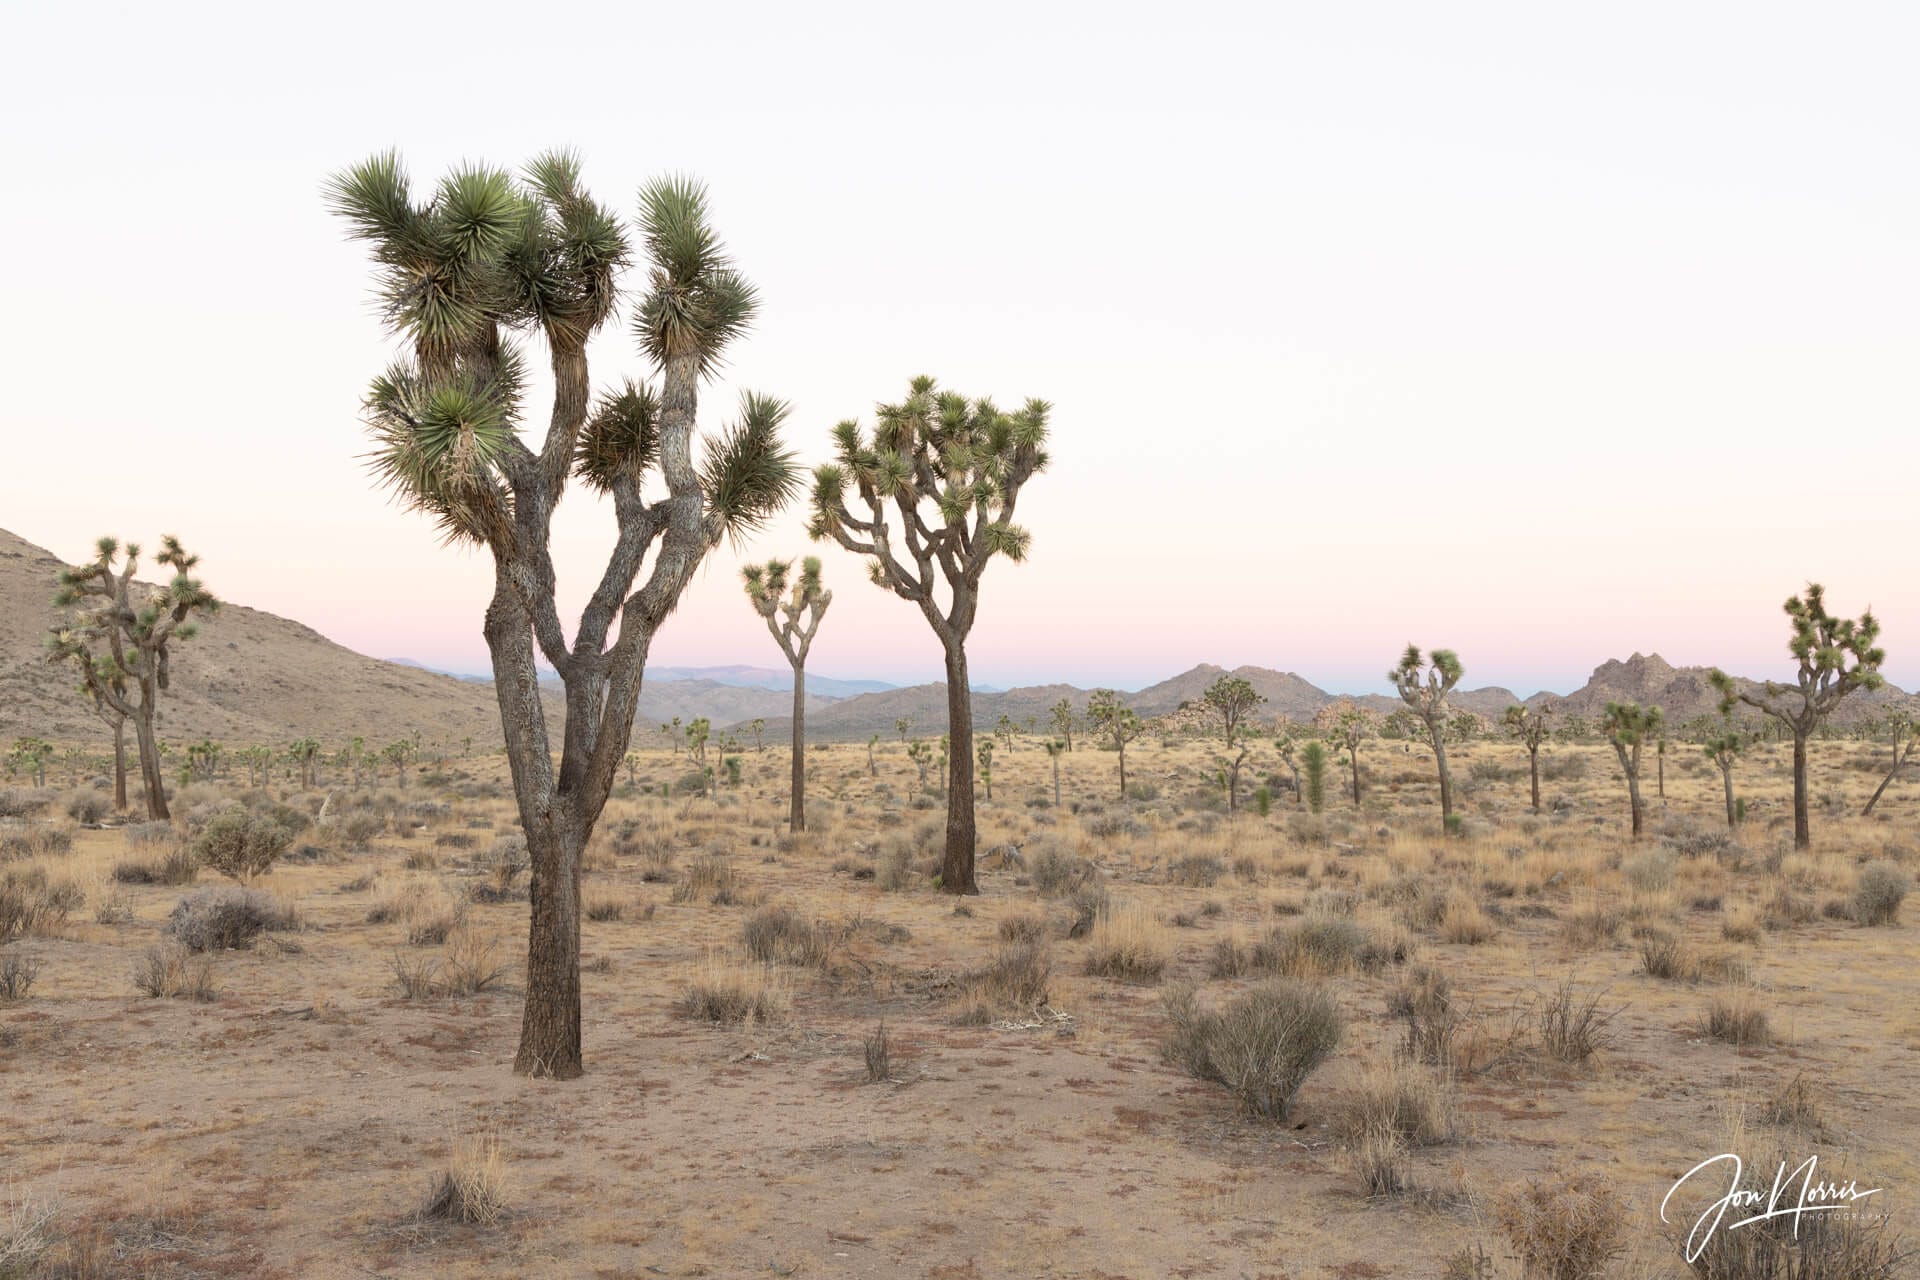
The last image (the brightest) captures the most detail in the foreground, but the highlights in the sky are clipped.
4. When Should You Use Exposure Bracketing?
You will often need to use exposure bracketing when capturing high-contrast landscape scenes, such as sunrises or sunsets, or at other times during the day when the scene’s dynamic range exceeds your camera's.
If you’re unsure whether the camera’s dynamic range has been exceeded, take a test photo and review the histogram. If you cannot adjust the shutter speed to keep the histogram from being clipped at one end or the other (or both), then you should use exposure bracketing.
Depending on the lighting conditions in your scene, you may find that one specific bracketed image gives you the desired result without combining multiple images. Having that choice of which exposure to use is another benefit of shooting an exposure bracket rather than a single exposure.
5. Merging Bracketed Shots
Merging your bracketed photos in Adobe Lightroom is straightforward:
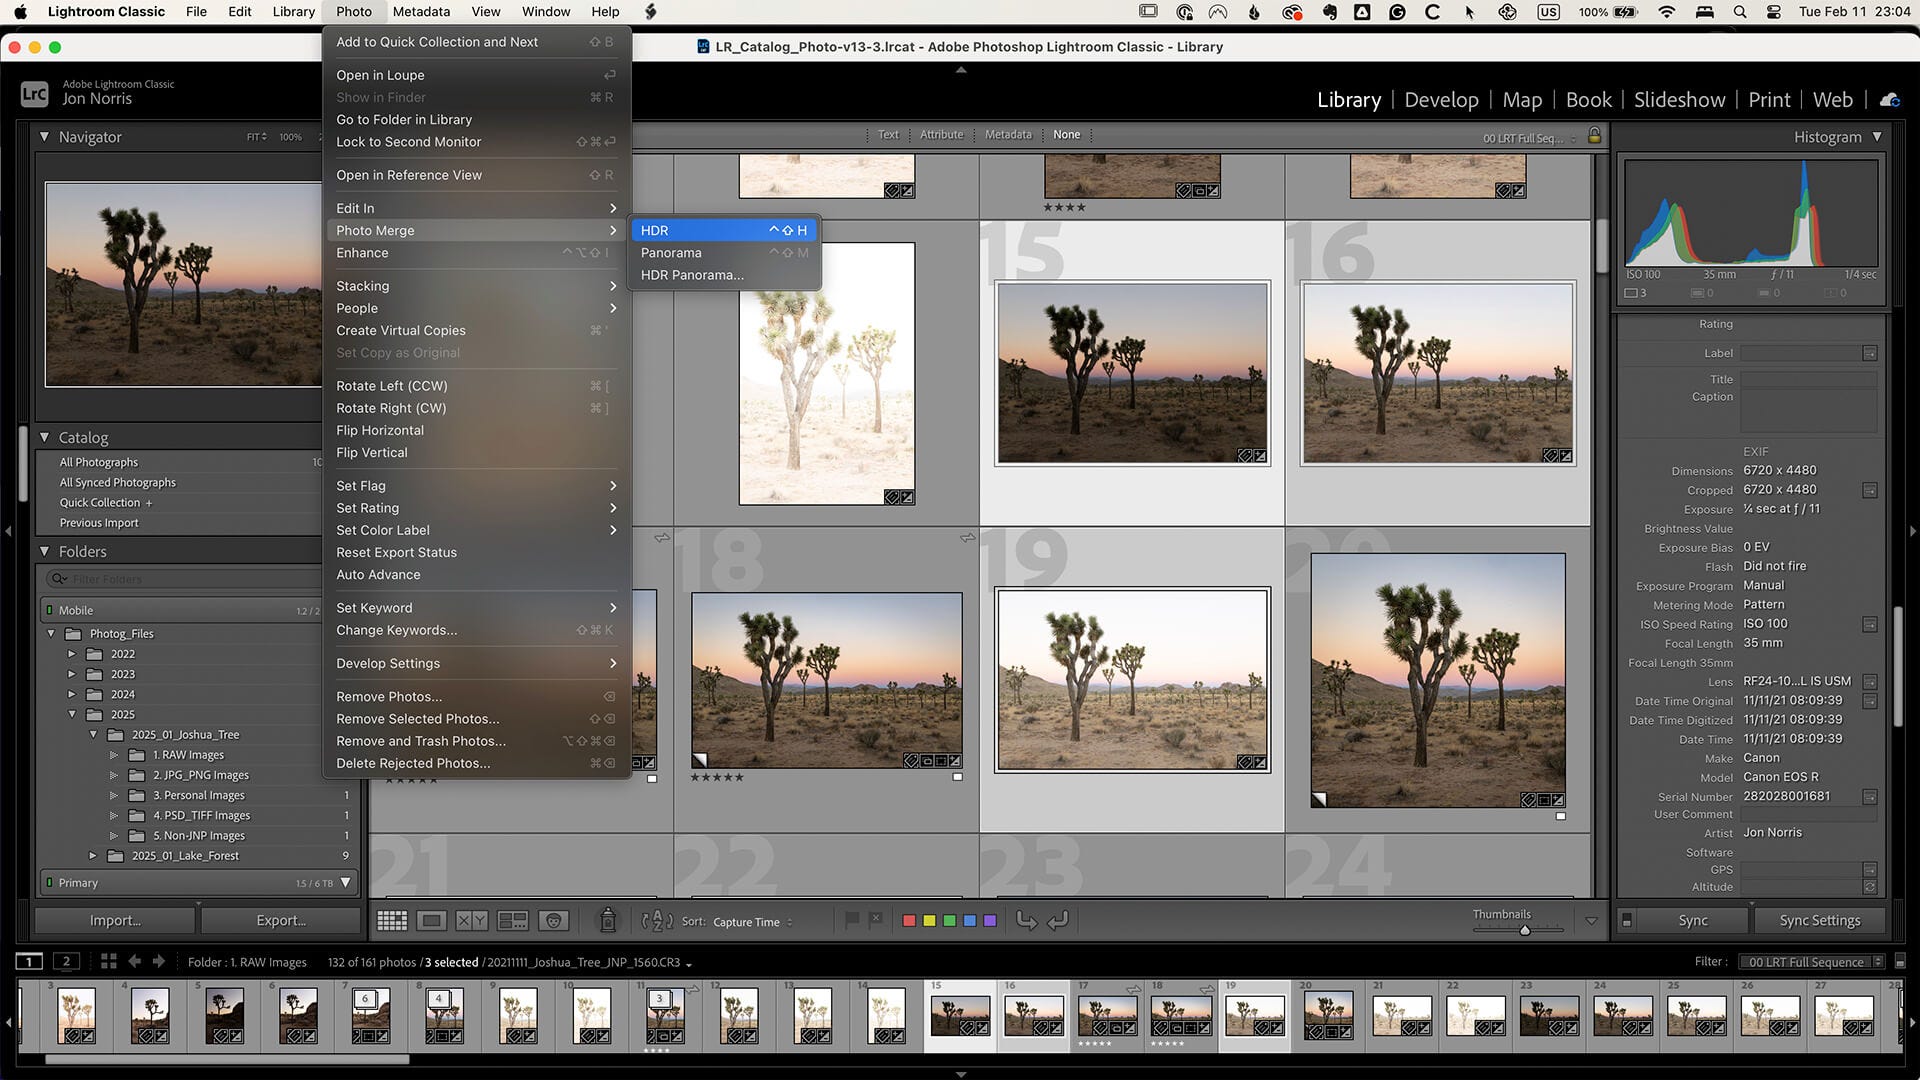
In the library module, highlight the bracketed images that you want to merge (see the 3 images that are shown with a lighter gray surround)
Click on Photo > Photo Merge > HDR
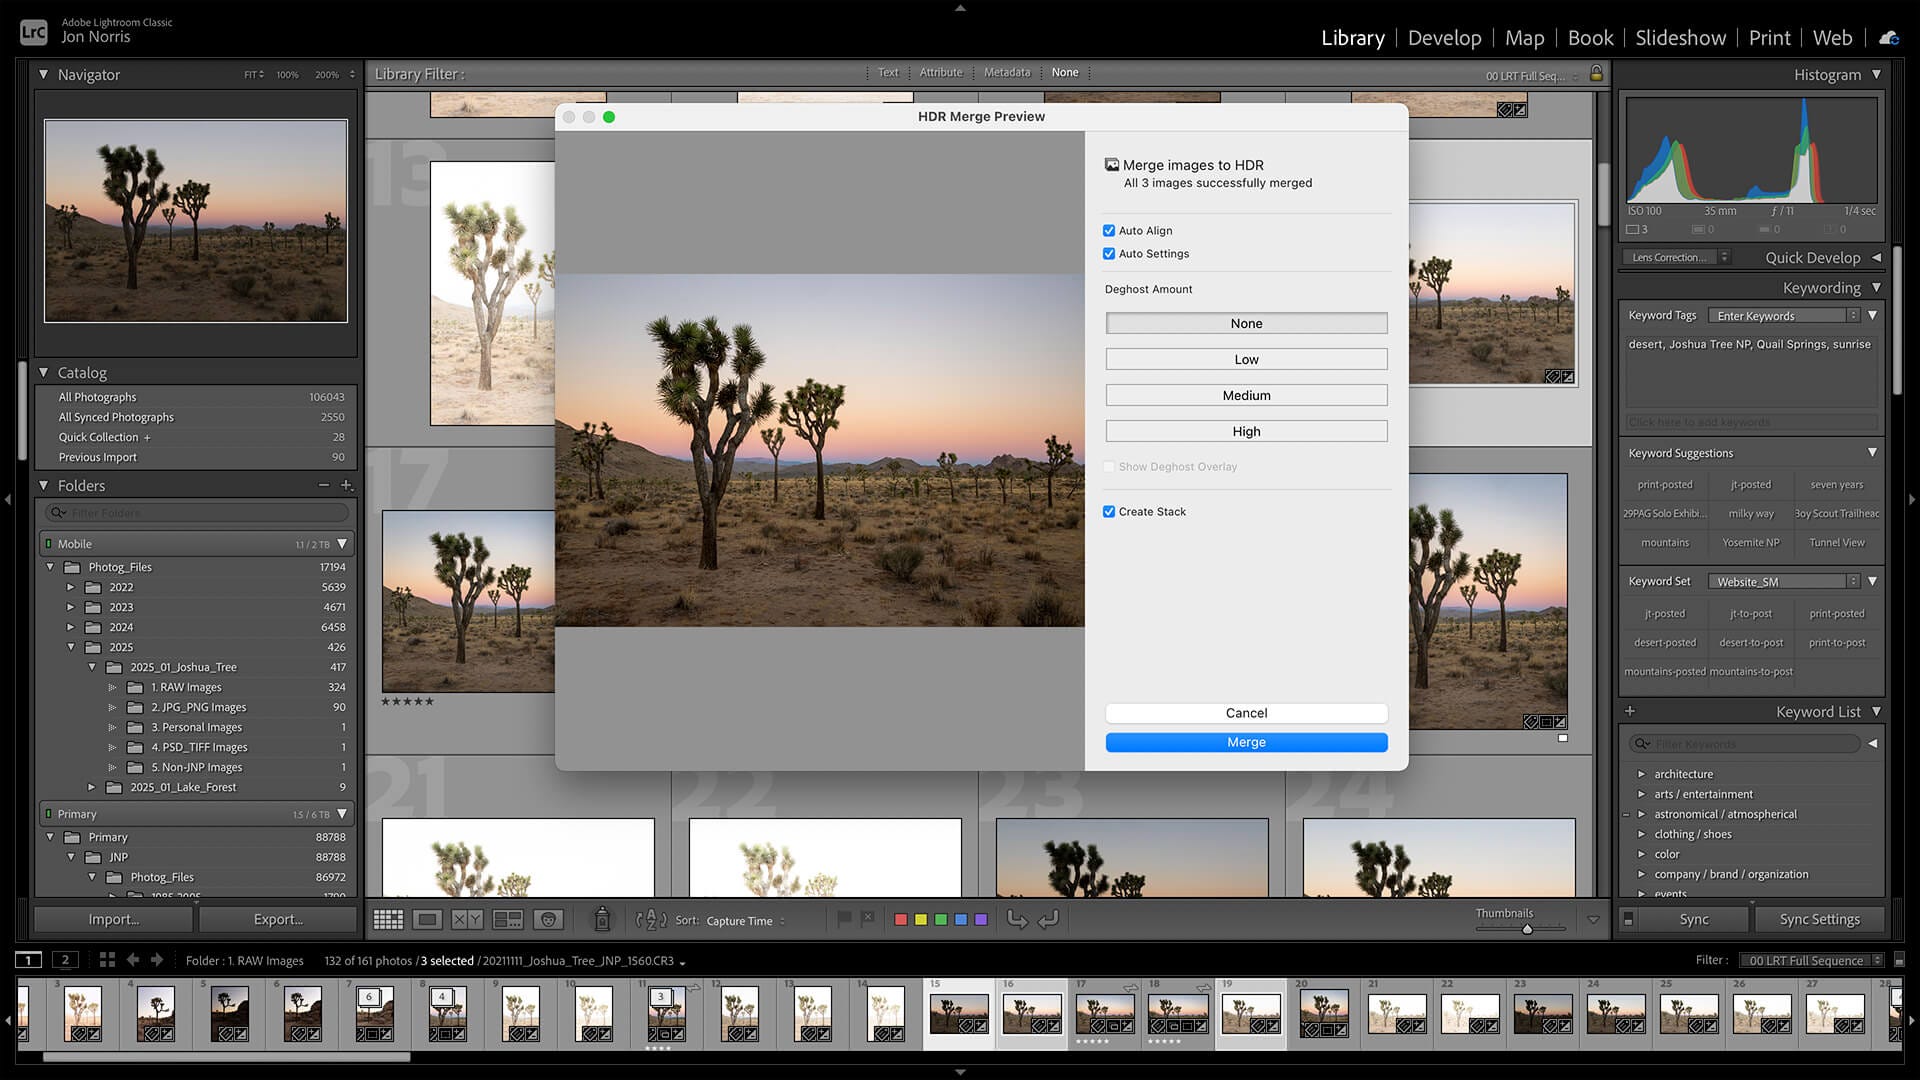
Lightroom will create a preview. If you‘re happy with the preview, click Merge.
6. Pro Tips for Bracketing Success
Here are a few tips on ensuring that your exposure bracketed images turn out the way you want them to:
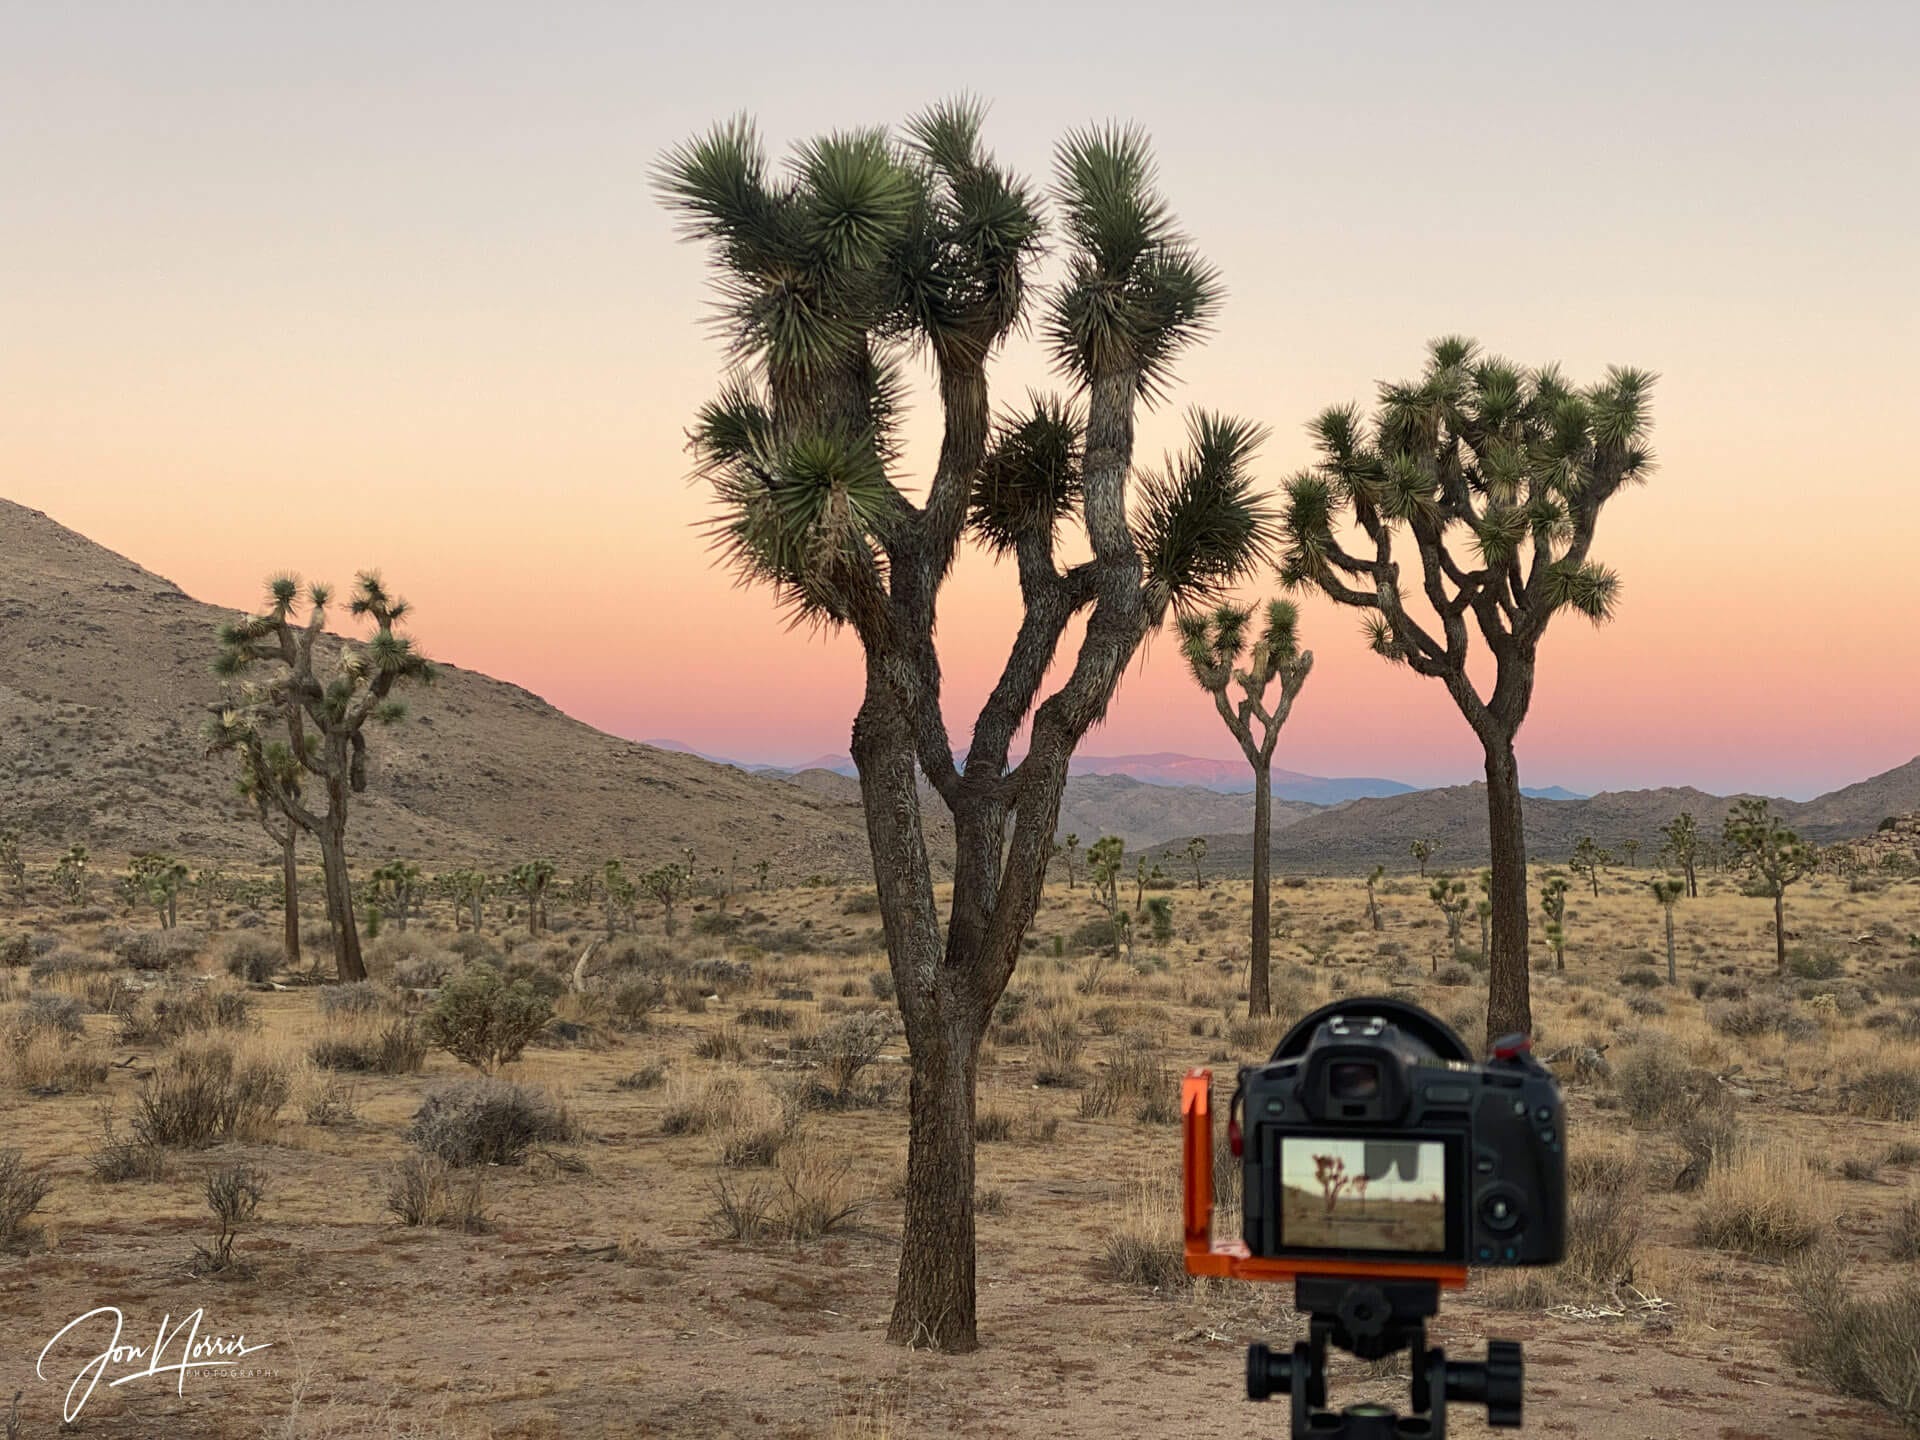
Use a tripod for sharp, aligned shots – you don’t want your trees and mountains to wobble!
Watch out for moving objects: wind, water, or birds can complicate bracketing.
Experiment with exposure intervals (e.g., 1/2 or 2 stops difference) for varied results.
7. Final Thoughts: Why Exposure Bracketing Is a Game-Changer
Exposure bracketing can help you capture what your eyes see - rather than what the camera can create in a single exposure.
It can also help you to create stunning landscape photographs by combining creativity and technique.
Please don’t hesitate to ask questions in the comments.
If you’d like to practice and perfect your exposure bracketing skills, join me on one of my landscape photography weekend workshops in Joshua Tree National Park (see flyer and info below).
If you’re not familiar with all the photography terms used in this article, take a look at the post below:
Also, look at my article on ’Trusting Your Histogram’ for some related background reading:

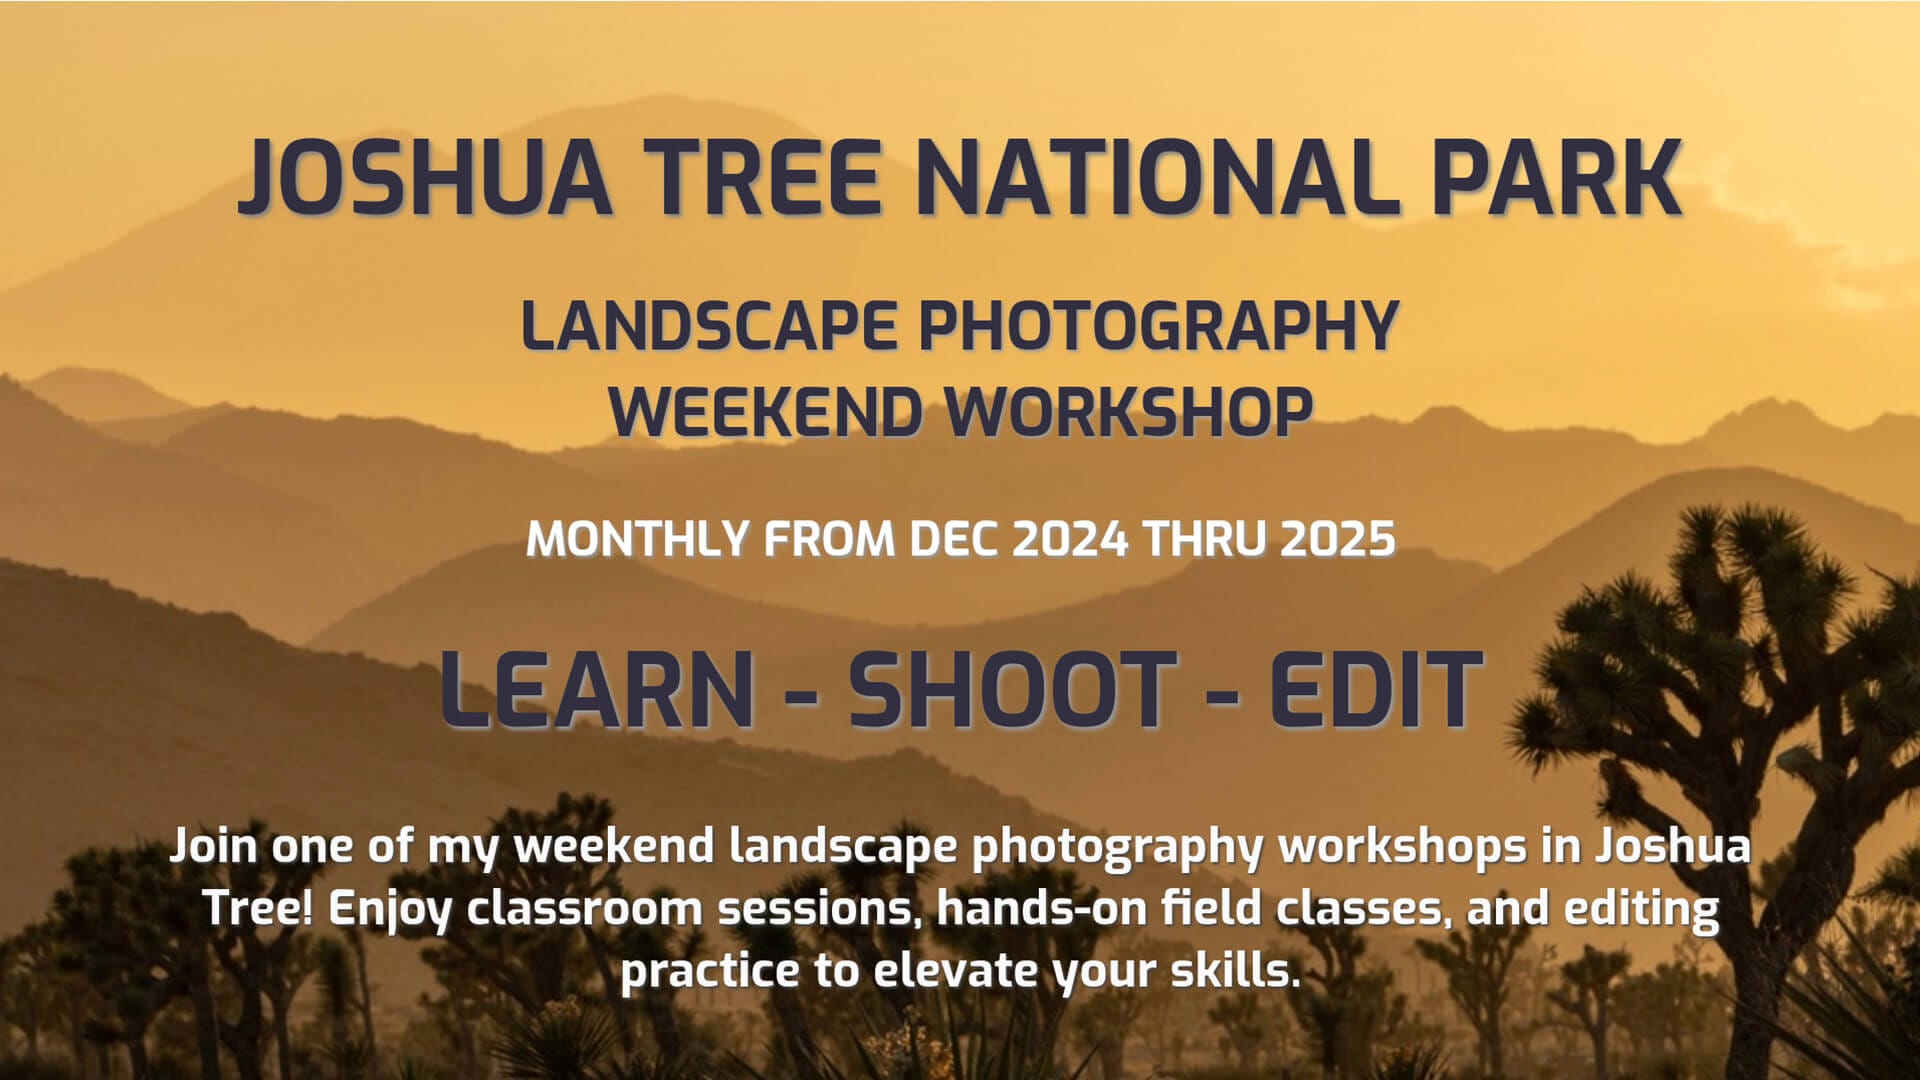
Capture Stunning Landscapes Like a Pro - Join a Joshua Tree Weekend Photography Workshop
Are You Frustrated With Your Photography?
You're passionate about landscape photography, but your shots don’t quite match your vision. Maybe your compositions feel uninspired, or your editing lacks the punch of pro-level images. Watching tutorials isn’t enough—you need hands-on experience and expert feedback to truly improve.
A Weekend That Transforms Your Photography
My immersive Weekend Landscape Photography Workshops in Joshua Tree are designed for photographers who want to level up. Learn directly from an experienced professional, practice techniques in breathtaking desert landscapes, and leave with stunning portfolio-worthy images.
👀 See immediate improvement in your shots
📷 Learn by doing—real-world experience beats theory
💡 Gain expert insights tailored to your needs
Alternatively, you can choose a one-to-one workshop (and personalize it to what you'd like to photograph, specific techniques, or how far you want to hike) or join a small group workshop (limited to three photographers).
Interesting musings, images, and art from others:
The joy of connection by Gill Moon Photography
Hay is sucking the Great Salt Lake dry by Jonathan P. Thompson
The Border Chronicle Forecast for 2025 by Melissa Del Bosque
EuroTripping: London in the Abstract by Kewtiebird’s Photo Journey
Where am I going? What am I doing? by Jenn Woltjen
Photographing windows by Susanne Helmert
It is the silence that settles loudest by Michela Griffith
Photographing in Winter by Benjamin Williamson
64. Inspiration by Xavi Buendia
Serendipity and the spirit of adventure by Shital Morjaria
One of my favorite places on Earth!!! Thank you for sharing your wonderful work!!! Subbed and followed! Out here trying to make new Substack friends 😊
Nice write up. I think HDR, the appreciation for light spectrum capabilities of the eye versus the camera sensor are largely misunderstood and for many photographers can provide better images and more fun and creativity. I’ve used Photomatix to combine and refine my bracketed photos, works well and is reasonable to license.